
By its very nature, riding is more dangerous than driving a car, even if you stick to motorcycles under 250 cc. You are far more exposed, only have two wheels for traction, and as a smaller vehicle in a society that keeps pushing towards larger trucks and SUVs, you’re not as noticeable. This is not to say riding a motorcycle is the most dangerous activity out there; it just requires that you keep your focus 100% of the time and remember to practice everything you learned in your motorcycle class.
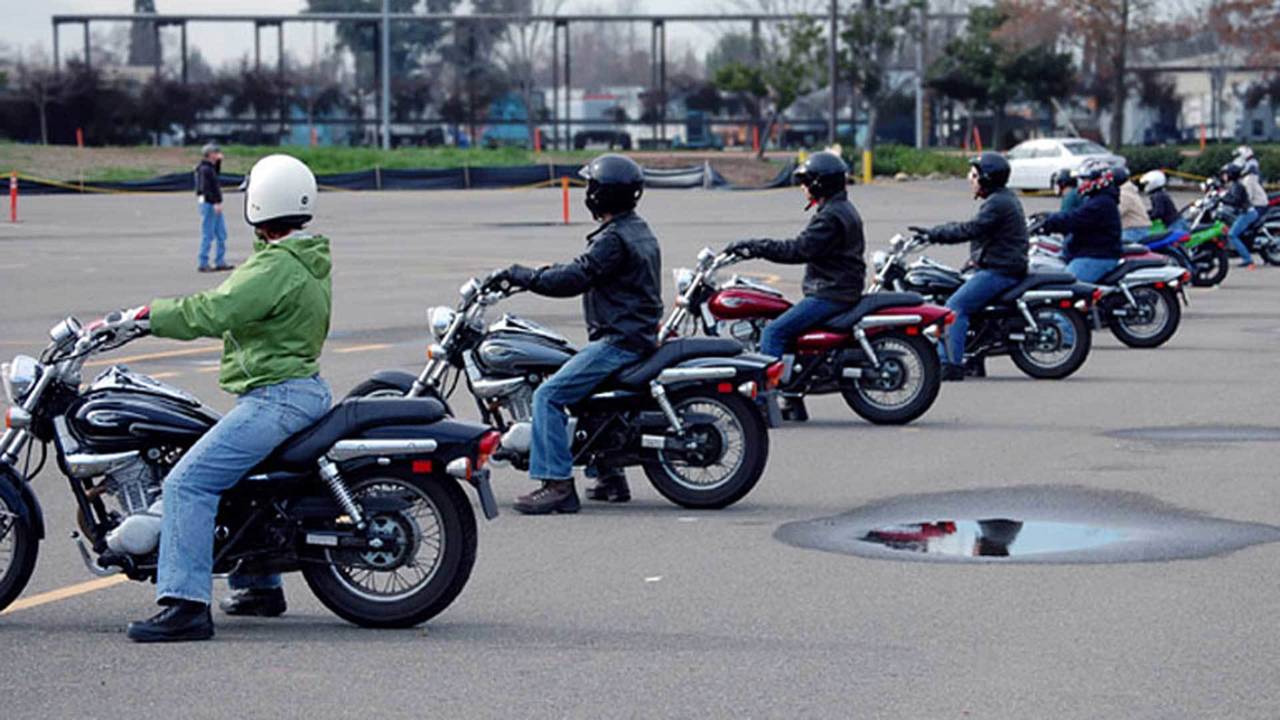
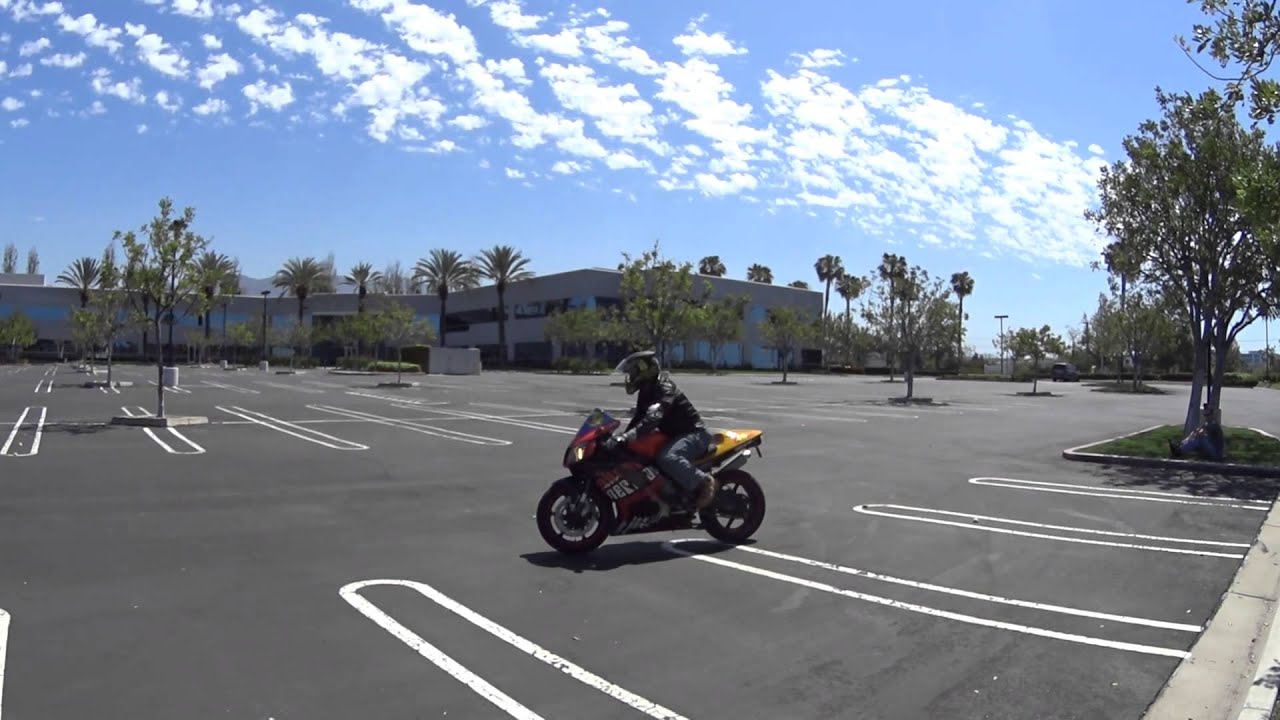
One of the reasons the motorcycle classes that you attended (or are going to attend) were done in a closed-off lot at low speeds was to get you familiar with how a motorcycle handles, moves, reacts, and feels. It’s also far safer to tip over, have a fall, or even crash into something at low speed than it is at 70 MPH on the freeway.
In this article, we’ve combined info from the Canadian motorcycle guide, the US MSF course guide, the UK’s Motorcycle Roadcraft guide, and Australia’s The Rider’s Handbook, along with our own experiences in motorcycle classes, to bring you 10 important safety concepts they all share. We’ve also included a couple of tips from veteran riders that are not taught in most classes or guides, so as to provide as much support as possible for newcomers.
#1: You Go Where You Look
Human beings, and most animals on this planet of ours, have an innate sense of balance. It’s how we can stand on one foot and not fall over; it’s how cats run at high speed and how dogs can jump over obstacles to land on all four paws. However, when you put a motorcycle between you and the surface you are standing on and set it in motion, you only balance on two gyroscopic points: yourself and the bike.
This is why all guides and motorcycle classes hammer into your brain that you have to keep your eyes up while riding. If you are approaching a right-hand 90-degree turn in first gear and fix your eyes on the curb itself, you are more than likely going to hit that curb with your wheels—or yourself.
Instead, as you prepare for the turn, look through it at eye level, focusing your eyes on the farthest point you can see down the road you’re turning onto. Then turn, counter-lean if you need to, and ride off down the road safely. This may be easier on a smaller bike—riding 150cc motorcycles might not sound like much, but it can help you master the basics safely.
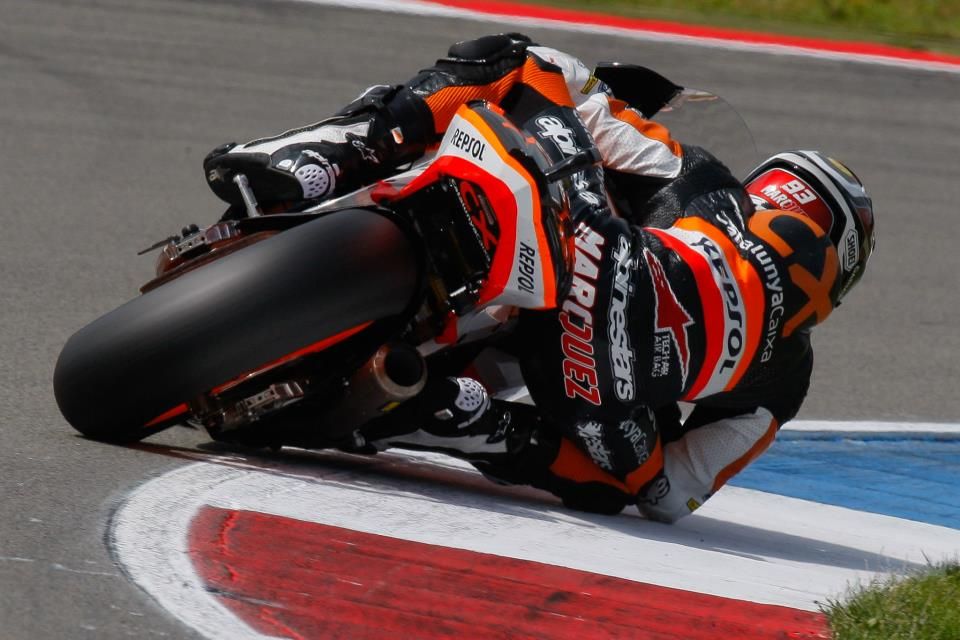
Going where you look can be demonstrated in the most extreme way by watching how MotoGP riders, the absolute best in the world, corner using their eyes and heads. Don’t pay attention to their lean angle or the fact they might be scraping a knee and elbow on the track. Look at their helmets and the angles they hold them at, and you’ll see that every single one is looking through the corner and down the track.
#2: Learn When to Lean & Counter-Lean
Motorcycles do not turn by simply turning the handlebars the way you want to go—unless you’re going under 7 MPH. But when you go faster, centrifugal force starts to push the bike’s weight away from the direction you want to turn. To combat this at first gear speeds, you want to practice counter-leaning to keep the bike going in the direction you want.
At speed (basically any gear above first), you want to lean with the bike to turn it. This moves the contact patch of the tire to the sides, if you look where you’re going, you’ll find yourself literally following the imaginary line your eyes are giving you. It is because of following this line while leaning over that taking turns is also called “carving”—since it’s exactly the same concept professional hockey players and ice sports athletes use to turn at high speed.
Here’s an example of when to counter-lean: you’re turning left with a controlled turning arrow that is green for you, and you’re heading for the inside lane of the road you’re joining. If you lean with the bike (i.e., tuck your body forwards and to the left, over the bike), you could induce rear wheel spin and maybe even cause a lowside crash if you add power too quickly.
Instead, keep the torso upright, lean the bike over to the left, and gently lean your torso to the right. You’ll find that the bike will turn precisely into the lane you want it to and will maintain its grip as more of your body weight pushes down onto the contact patch.
#3: The Rear Brake Is Your Friend
On everything from sportbikes for new riders to the best supersport motorcycles, you’ll more often than not see two massive ventilated discs for the front wheel brakes and a single-disc rear brake about half that size. It’s true that 95% of all the braking you’ll be doing is primarily with the front brake, but don’t forget that little lever under your right foot.
When braking to a stop, you want 80 to 90% front brake depending on speed, but you also want to add 10 to 20% rear brake. Since the main gyroscopic force of the bike comes from the rotation of the rear wheel, if you brake too hard with the fronts, you can end up lifting the rear wheel off the ground. By feeding in the rear brake, it stabilizes the braking force across the bike and helps keep balance while you ease off the front brake as you come to a stop.

It is also vital for low-speed maneuvers. Take your bike to an empty parking lot, and try to follow the painted line that separates face-to-face parking spaces at the slowest speed you can, using only the clutch and throttle. Turn around at the end, and then do it with the clutch, throttle, and rear brake. Which one is easier?
Instead of wobbling side to side and maybe staying on the line 50% of the time, using the rear brake can make it easy to keep that line under your wheels—almost like it’s being drawn by your tires.
Basically, the rear brake can be viewed as the “balancing brake,” while the front brakes are seen as the “main brakes.” It’ll feel extremely weird for the first week or so of riding after your course, so practice around your neighborhood and in empty parking lots. One day you’ll find that suddenly, working the brakes and knowing how much of each to use when stopping just becomes natural.
#4: Ride As If You Are Invisible & Maintain 360° Awareness
As a motorcycle is a smaller vehicle than a car, it is quite possible that an inattentive driver might not see you before they turn left at a light, before they change lanes, or in hundreds of other situations. This risk is doubled or even tripled at night—requiring you to be on your toes, as it were, whenever you ride.
For example, almost every course the world over will teach you to cover the front brake as you approach a controlled intersection with lights. You might be blocked from sight by the SUV in the lane next to you, when all of a sudden, a car turns in front of you. By already having your fingers over the brake lever, you can apply quick but progressive pressure on the brake to bleed off speed and react to the vehicle far faster than it takes for you to release the throttle, get your fingers over the brake lever, then possibly panic-brake and go over the handlebars.
Part of riding as if you’re invisible is also riding with knowledge of everything around you. That means frequent mirror checks, shoulder checks before lane changes, and constant scanning both ahead and to the sides. Being aware means you have a much higher chance of being alive at the end of the ride.
#5: Ride Calm
YouTube is a great place to go if you want to see what riding angry looks like, as there are tons of creators making compilations where riders react exactly the wrong way to various situations. If someone is signaling a lane change, and you’re two seconds behind their rear bumper in the lane they’re changing into, that is not your signal to twist the wrist, get closer to them, then beep and get nasty because they changed lanes.
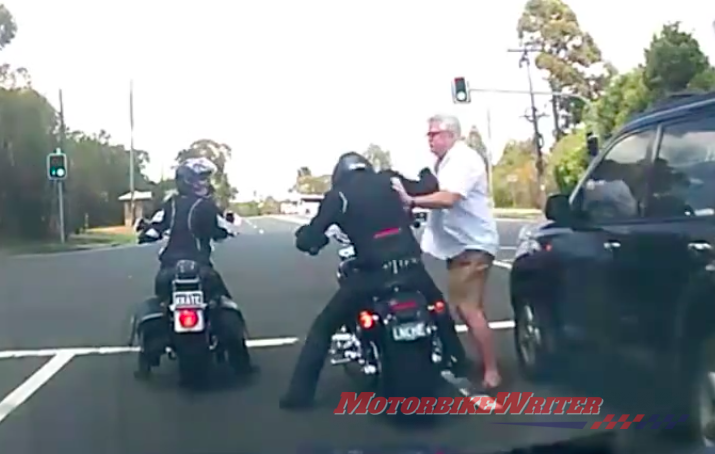
The proper reaction to that hypothetical is to roll off a tiny bit of throttle and bring your spacing up to 2.5 or even 3 seconds so that when the offending vehicle changes lanes, you’re already at an appropriate following distance. If someone does cut you off accidentally, don’t lay on the horn, hit their mirror, or get in their face at the next stoplight.
They may spot you after the move and wave sorry, and you know what you should do then? Accept the apology and continue your ride.
Road rage is a real problem—even more so now that everyone’s been cooped up inside during the global pandemic. Cabin fever can affect everyone—so if it truly was an accident and no one got hurt, it’s not worth escalating.
Smashing mirrors, screaming at drivers, and kicking their cars? All that paints a very poor picture of riders. Be the better man/woman, turn the other cheek, and just go about your day.
#6: The 5, 5, 5 Rule
This is something that is touched on extremely briefly in most courses. The 5, 5, 5 rule is a simple but effective way to keep your skills fresh and your awareness up. At the start of your ride, find a parking lot, rarely used road in your neighborhood, or anything like that, and practice slow-speed maneuvers for 5 minutes. Do some slow speed avoidance swerves, practice your hill starts, and practice your U-turns without putting your foot down.
In the middle of your ride, find another parking lot with an open space away from cars and pedestrians. Then get going up to 15 or so MPH and practice your emergency stops. Remember: put four fingers on the lever, give a quick but progressive pull starting with the little finger, then add rear brake progressively as well. Practice for 5 minutes, with more U-turns and emergency lane changes as well.
At the end of your ride? You guessed it: 5 more minutes of drills and skills. Generally, it’s best to practice things like precision slow-speed riding along a painted line or slalom skills at the end of your ride because that is when you are the most worn-out. Doing so will train your muscle memory and mind that even when you want to slip the helmet off and wipe off the sweat from your head, you still need to focus on your skills.
Training for those 15 minutes on each ride and riding 2 to 5 times a week will help you gain confidence and experience rapidly. Just make sure you keep calm and don’t get overconfident or frustrated. If you do, park the bike in a parking spot, sit on the curb for a few minutes, hydrate, let the frustration evaporate, and get back to it.
#7: A Neglected Motorcycle Is an Accident Waiting to Happen
Whether you get your bike brand-new or buy a used motorcycle, every person with a bike should have their owner’s guide, either digitally or on paper. Within that owner’s guide, there should be a section called “Maintenance Schedule.” This one is a pretty simple safety concept, but you need to follow that maintenance schedule.
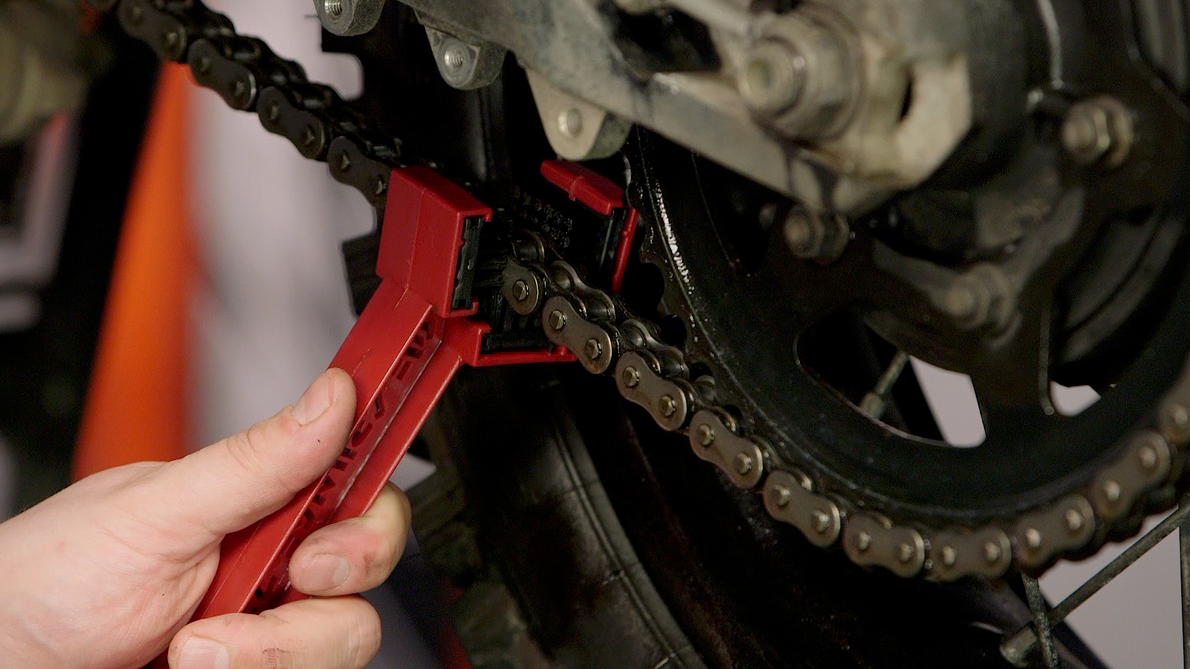
Most (if not all) manuals recommend cleaning and lubing the chain every 400 to 600 miles (or 700 to 900 kilometers). Most veteran riders equate this to two tanks of fuel, from full to mostly empty. Clean your chain, inspect it for any stiff links, and apply proper chain lube. It will take 30 minutes if you’re extremely slow and take your time.
Check your front and rear shocks every couple of weeks and look for leaks, breaks in the seals, telltale trails of grime, or streaks of dirt that show possible seal degradation. You really don’t want your suspension to bottom out and then stay bottomed out while riding.
If you don’t lube your chain, inspect the shocks, change the oil and oil filter on the maintenance schedule, and periodically check your coolant levels, you could have a mechanical failure at speed. Take the time every month to do a full once-over of everything from the headlights to the tail light. And make it fun by getting out a bucket and cloth and giving your baby a bath! A clean, well-maintained bike is a bike that will keep you happy for years to come.
#8: Walk Around Check Every Time
This is a section of many courses that they show you how to do once or twice, but 95% of people never do it again. Plan your ride to be at your bike a good 10 to 15 minutes before you even need to start it. Check your tire pressure, oil level, headlights, blinkers, and brake lights. Test your clutch tension, your brake lever tension, and throttle feel (if it’s a cable throttle).
Once that’s done, use your eyes and look for anything that doesn’t seem right. Small oily patch just in front of the rear wheel? Check your rear brake cylinder for leaks. Wire hanging down that wasn’t there before? Get a flashlight and peer into where it’s hanging out to see if something’s come loose.
Finally, start your bike up and listen for any odd noises as it warms up. New rattle or squeak from somewhere? Trace it down and figure it out. It takes 5 to 10 minutes to walk around and check everything and another 5 minutes for your bike to warm up, which gives you time to don your helmet and get your gloves on. Then, if it’s all okay, enjoy your ride!
#9: Ride Within Your Own Experience & Limits
This one is really down to the rider, and it’s very important if you ride with your friends in a group. As a new rider, intermediate rider, or even a veteran, you ride your own ride. If your buddy on their exotic supersport motorcycle wants to drag a knee around the next corner at twice the speed limit, you don’t have to follow them. Take the corner at the speed you feel comfortable with, within the speed limit for the road.
If your friend keeps chiding you about not putting in massive leans on turns or for “being slow,” then they probably aren’t the best riding friend to have. If they can’t respect your skill level, simply let them fly off into the distance at great speed while you actually enjoy your ride and the scenery.
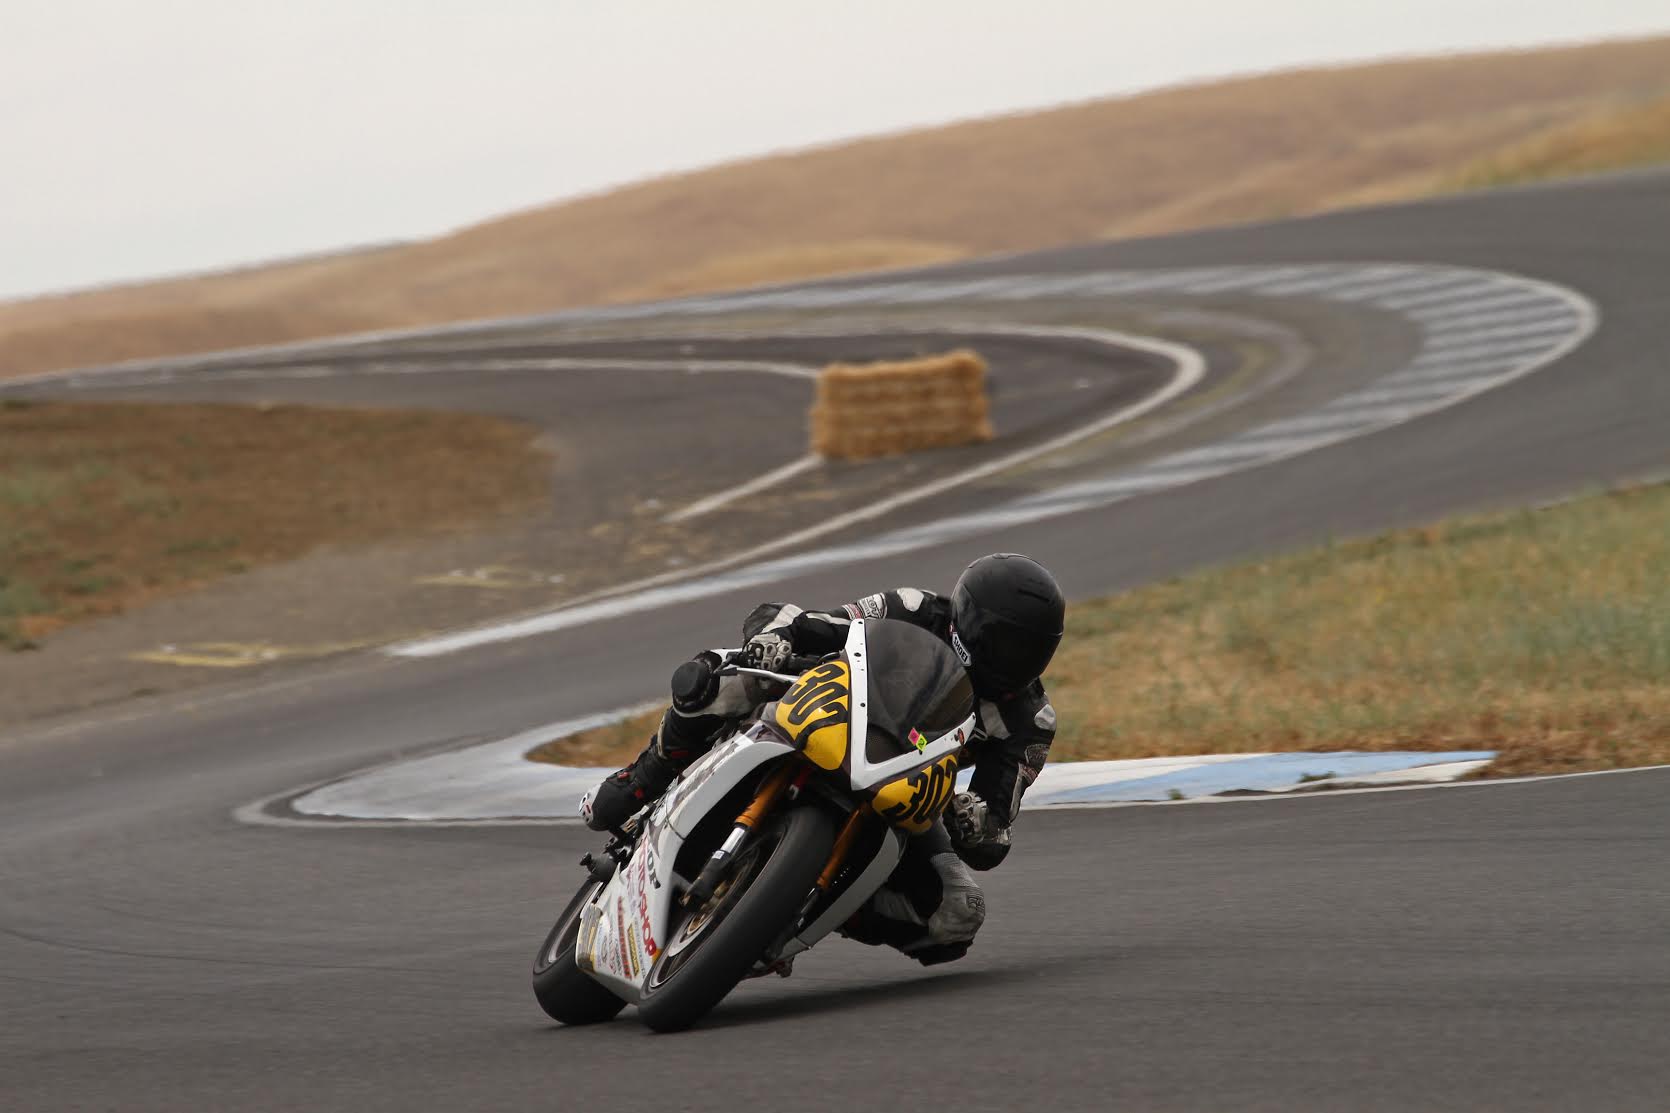
Also, if you do want to get some high-speed experience, never, ever do it on a public road. Across the US and the UK, and to a smaller extent Australia and Canada, there are race tracks that host track days. These are purpose-built areas with run-off spaces, safety barriers, and, more often than not, classes you can take to get your skills up. The track is also the only place we would recommend even attempting to get your knee down in a turn—and only if you have a knee slider on!
#10: All The Gear, All The Time (ATGATT)
Sometimes presented in the UK and Australia as “Dress for the slide, not for the ride,” this is one safety concept that has nothing to do with the actual motorcycle and everything to do with the rider. This concept is 98% mental and 2% physical. It is also, quite possibly, the one safety concept that will make the difference between you living or dying in a crash.
The basis of this concept is full-body protection, literally from head to toe. Even if you’re just riding from the street in front of your place to the garage in the back, you need motorcycle riding boots, armored motorcycle riding pants, a motorcycle riding jacket, motorcycle riding gloves, and a helmet (preferably a full-face helmet). There have been fatalities—not just injuries, but fatalities—from people riding their bike as slow as 5 MPH around the corner without proper gear. The bike tips, and they fall, crack their skull on the curb, the sidewalk, or a parked vehicle, incur a traumatic brain injury, and die.
The much harder part is the mental side of this—specifically, the “it’s so nice out and I really want to go for a ride” aspect. Many US states have minimal helmet laws (or none at all) and absolutely no laws regarding minimum protection, but that’s not a reason to ride unprotected.
If you’ve recently had a fall and scraped up or dented your helmet and the new one hasn’t arrived in the mail yet, then put the keys back in their place. Then sit down and binge-watch a show, or go for a jog. Do whatever you want; just don’t go riding.
A great way to remember this is to keep in mind what I was taught by one of the veteran riders at my favorite gear store in town. It is known as the “tap test.” Start at your feet, and quite literally tap each piece of gear. Tap your riding boots, then your knee pads/leather pants/textile pants/etc. Tap your jacket with its main zipper done up and secured. Tap your helmet with its strap done up and secured (tap the side of the helmet, then tap the strap). When your gloves are on and done up, tap the knuckles together. It takes less than a minute and could quite literally save your skin.
You really don’t want to know what happens without protection—but if you are willing to see graphic images of injuries and recovery, one of our writers, Brittany Morrow, is known as the Queen of Road Rash for a good reason.
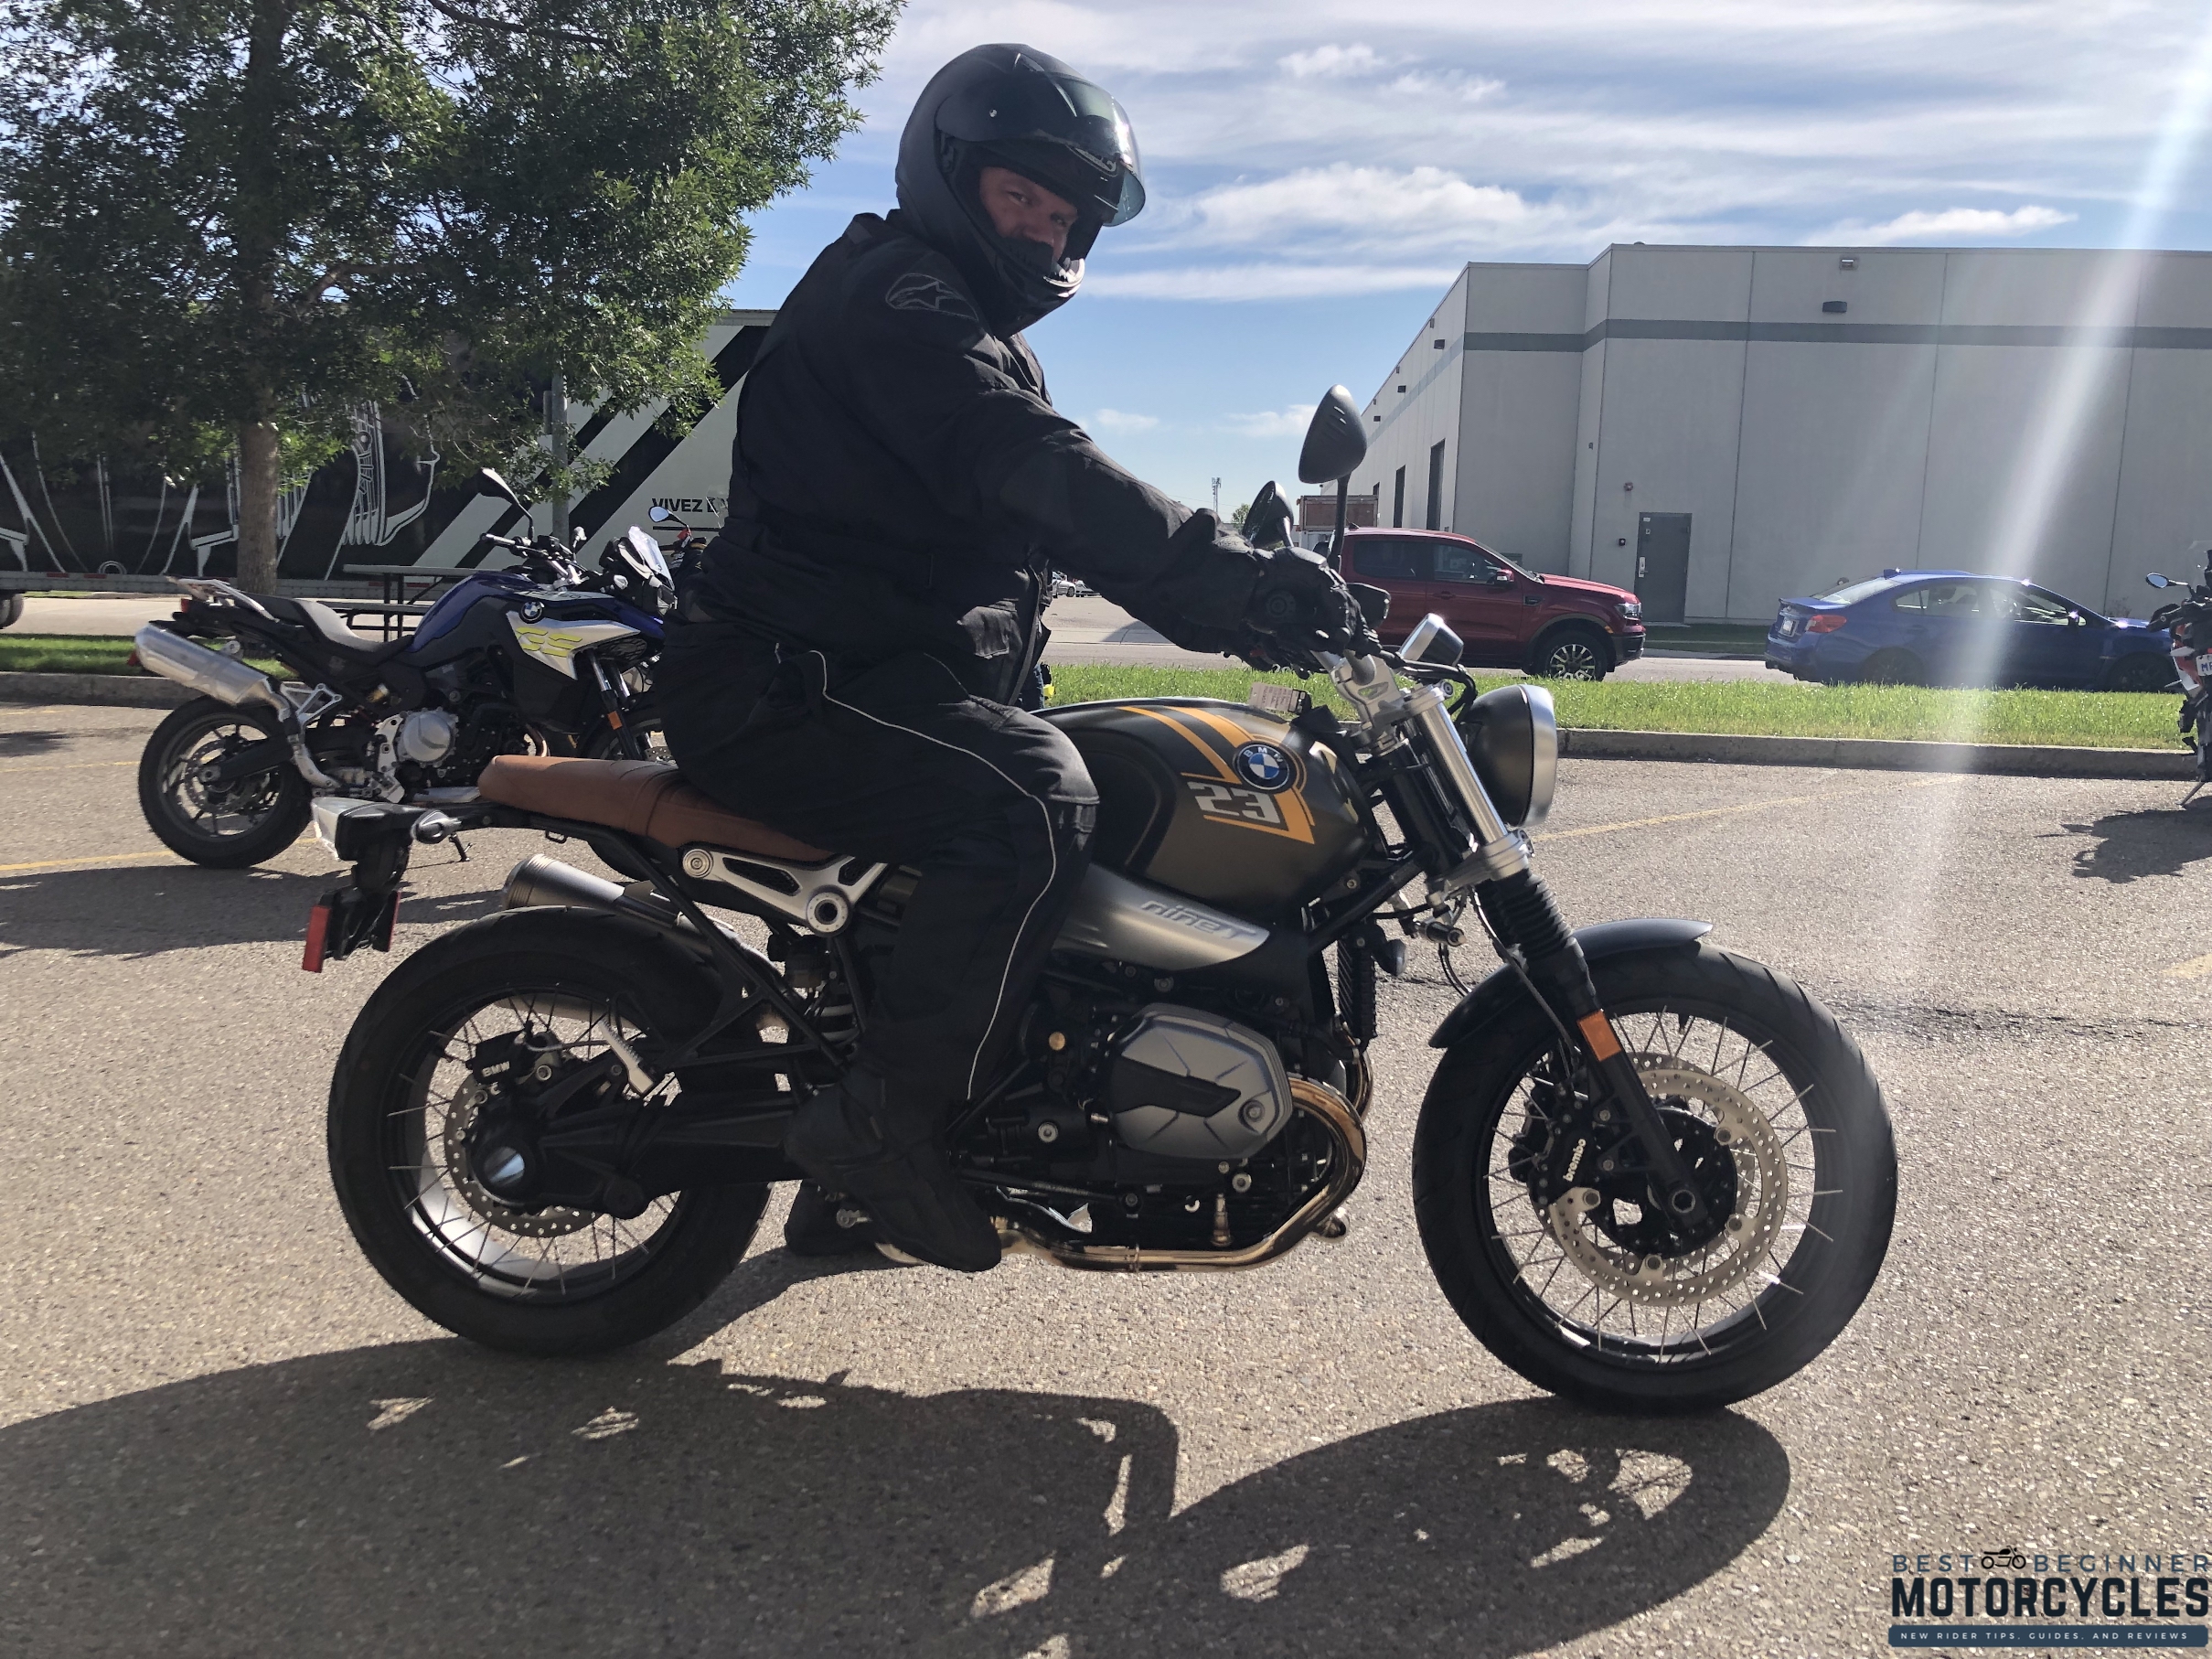
We don’t just state this safety concept here at BestBeginnerMotorcycles; we actively practice it. The picture below is of me at a BMW demo ride day in Calgary, dressed head-to-toe in all my cold-weather gear on a chilly morning.
The picture below is of Amanda, one of our editors and the closest thing we have to a news correspondent at webBikeWorld. Notice that even though it is a bright, sunny, hot day, she has all her gear on, head-to-toe, as she rides her Yamaha R3 around Ontario.

At the end of the day, it’s better to be a little hot and sweaty and keep all your skin on your body than to be riding in a shirt and shorts, then have to deal with abrasion burns and skin grafts! Remember this safety concept and the others listed above whenever you ride—they might just save your life.
