
The excitement of passing your license test and getting that Class 6 (Canada), M Endorsement (USA), A2 (UK), or whatever is used in your country is something you will never forget. It’s a landmark of the hobby that means you’ve proven your basic understanding of concepts and controls of a motorcycle. What is important to remember, however, is that passing your license test is not the end of learning, but only the beginning.
This is where the “Five to survive” rule comes into effect.
A Concept Known by Many Names: What It Really Means
Three by five. Five to survive. Five alive (I assume that’s borrowed from the juice, but it works). These are just some of the names given to this rule, but they all mean the same thing. The whole concept revolves around the core of taking five minutes at the start, middle, and end of your ride to practice. Riding a motorcycle is a skill that is perishable, and without constant vigilance to keep it honed, it can erode.
Keep in mind, a lot of motorcycling is practiced and constantly honed while riding. Clutch slip, throttle amount, smooth braking, slow-look-lean-roll—all of them are things you will keep doing over and over, leading to experience and increasing confidence in riding ability. This is not where the Five to Survive rule comes into play.
The perishable skills, the ones that are rarely used, are what the rule is all about. How often have you practiced a u-turn without needing to put your foot down? How often have you had to ride at a crawl, balancing the clutch, throttle, brakes, and keeping your eyes up so you don’t target fixate on the ground? How often have you practiced emergency braking or avoidance?
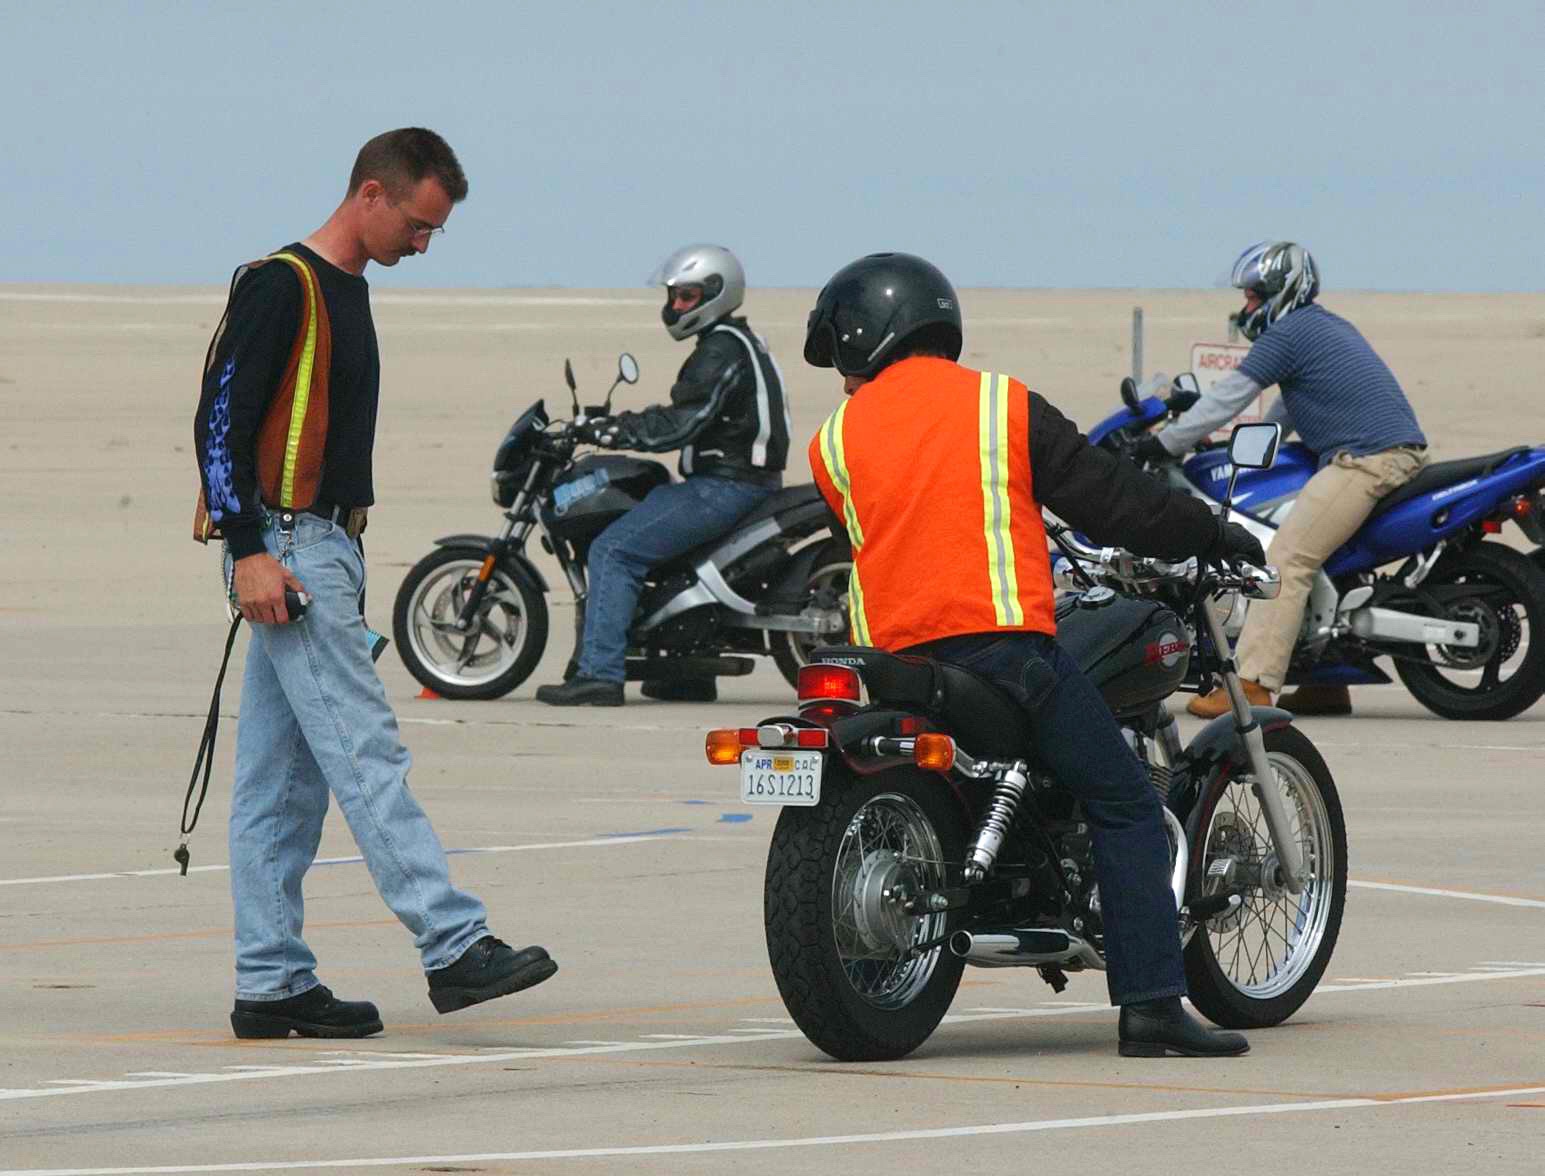
For most new riders, the answer to the previous paragraph is “during my MSF course.” At this point, we also want to reinforce that we are in no way being critical of you, the new rider. We were all, to the person, once like you: eager to get the helmet on, the buckle fastened, and the throttle cracked open on the open road. It is because of the five to survive rule, in whatever form we learned it, that we are still here today to write about it.
It is also a rule that helps you become a more complete rider, and as such, it holds enormous value. There are some riders out there you will come across that can ride a supersport like they were in MotoGP, but ask them to do a U-turn and they’ll have both feet down, waddling the bike around a turn with the clutch in. There are some cruiser riders out there that have clutch grab issues because they do not practice extremely low-speed clutch slip.
Even myself, as the author of this article, initially had issues with very low-speed straight-line riding, but I got myself out there and I practiced, and practiced, and practiced. I’m still nowhere near the world’s best low-speed rider, but I can, from that practice, ride at a crawl without the threat of tipping over.
We have already anticipated your next question, as well, so let us head into…
What to Practice During Those Five Minutes?
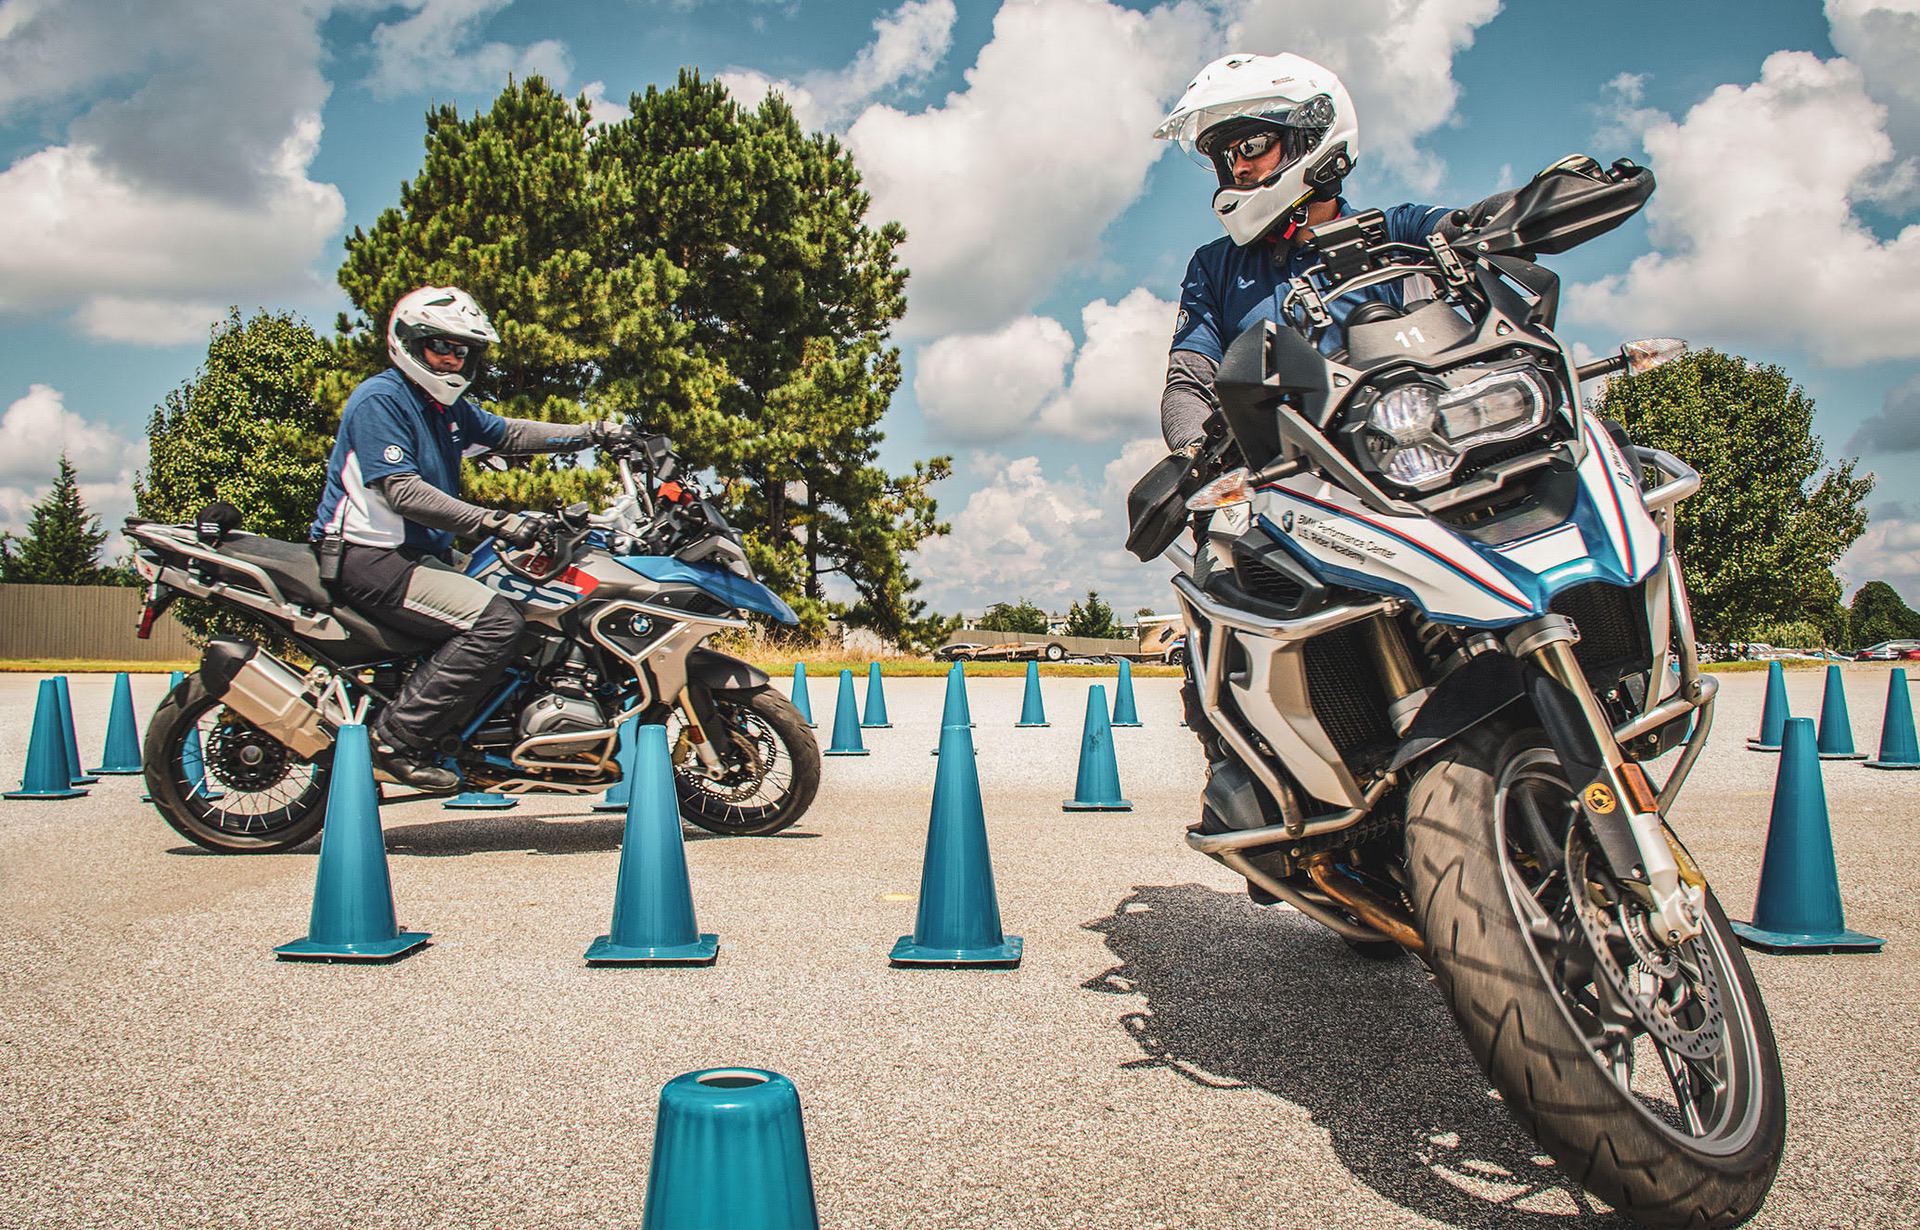
First things first: you need to find a parking lot or some open space with very little traffic, where you can either use the parking spot lines or set up mini cones for your reference points. As well, you don’t need too much space, as most of what to practice is done well below even 15 MPH.
Core Basics to Practice
Put simply, the title says it all. Many riders will do their MSF, pass it, get their license, and then not look back at the basics. There are four core basics that every rider should know (and, realistically, should practice every week). These are:
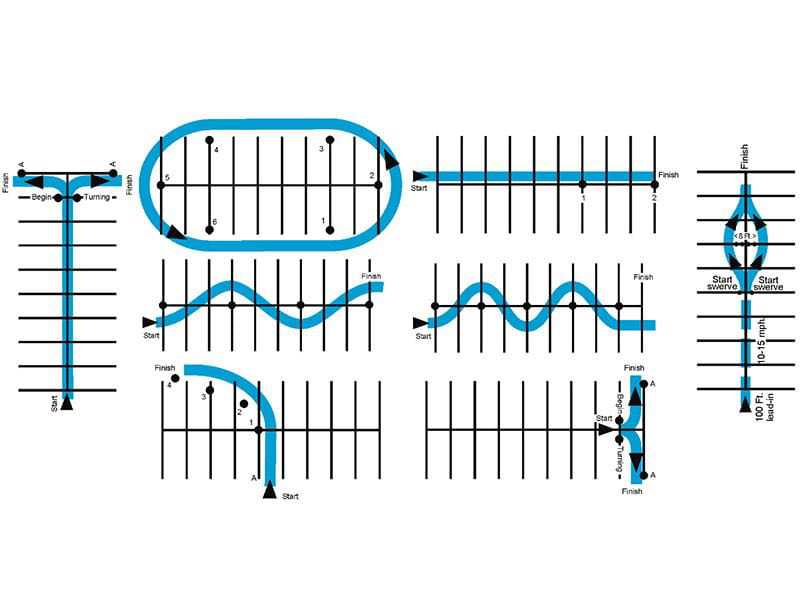
- Extremely low-speed balance. In today’s stop-n-go commuting world, being able to crawl along—or, in those states where lane splitting is legal, ride at low speed through stopped traffic—is a vital skill.
- Low-speed 90 degree turns. When you don’t have enough speed for your bike to turn via leaning, you have to use the friction point, rear brake, and steering input method of turning. Lots of practice on this one leads directly to the next vital skill…
- U-Turns. Yes… those. You would be surprised by how much this is an undervalued and under practiced skill. You really should practice your u-turns to the point that you can complete the 180-degree arc within the space of two normal parking spaces, hence why practicing in a large empty parking lot is a great idea.
- Emergency Maneuvers. During your course, you had that day that was all about braking, wildlife avoidance, how to change lane positions in an emergency, and the like. You want these to be more muscle memory than anything, so practice, practice, practice. Use little cones if you want, to mark out a braking line, or have a fellow rider hold up their hand and when they drop the hand down at random, you have to perform the skill you’re practicing.
Advanced Basics to Practice
The four basic things to practice will get you out of trouble 95% of the time. Once you’re confident (but not overly so that you stop practicing them!) with the basics, you can throw in a few advanced basics to spice up your Five to Survive minutes. These can include, but are not limited to:
- Figure-Eights. A great way to practice low to moderate (10-20 mph) speed cornering, with a transition in the middle to get used to coming out of a lean, moving your body over to the other side of the bike, and getting into the new turn. All you really need for this is two reference points, which can be cones, backpacks, et al, about 20 feet apart in a nice, open, non-gravel area of a parking lot.
- Advanced braking. Most of the braking on a bike is done with the front, but don’t neglect the power of the rear brake. As well, bikes have two different braking inputs, with your right hand and right foot. We’re not talking about threshold braking (although that is a very useful skill), but we are talking about using the rear brake gently if you need to slow down in a corner, or how to trail brake the last 2-4% of the front into a corner without low siding or washing wide.
- Advanced body positioning. You want a nice open space for this, and we’ve found that an empty sports stadium parking lot is a great place. Set up a cone or two to be your turning marker, and get into a 15-20 MPH corner position. Move your body around a little each time. Scoot over in the direction of the corner in the saddle before you corner. Tuck your head down and to the inside of the corner the next time around. As my course instructor, a former superbike racing champion told the class: “Listen with more than just your ears. The bike is talking to you… are you listening?”
- Self-restraint. Wait a minute, we hear you saying, so let us explain this one a bit more. The number one cause of single-vehicle motorcycle accidents isn’t speeding, or lack of gear, it’s overconfidence. That is why your course instructors spoke about “building confidence,” instead of “gaining confidence.” It’s very subtle wording, but the MSF (or your bike course) isn’t there to give you everything you need to ride. It’s there to lay a foundation for you to build your confidence upon, brick by brick. Build that house of skills properly, carefully, and with restraint, and you will enjoy decades of riding.
Of course, these are just a few of the several hundred small skills and techniques you should be practicing on every ride. It’s “Five to Survive” not because it’s just five skills or five things to remember. It’s named that because it takes five minutes out of your ride to go over the basics and some advanced basics.
Even just a couple of u-turns in the parking lot, a run-up, and then threshold brake, backing that off into a trail-braked corner with your body leaning in and your head forward and low before you head back out to the road is enough.
To help you out, here are some free-to-use practice guides that we found on the internet, and that we have ridden ourselves to verify that they are doable for all levels of riding skill:
“Critical Riding Skills”
Five Minute Drills

GoldWing Road Riders Association Parking Lot Practice GuideBook (PDF)
If you’re riding a cruiser, a continental tourer, or any other large bike, this guidebook is excellent in providing you with parking lot drills you can do for Five to Survive with a larger, heavier bike. The emphasis in the guide is on smooth maneuvering, slow speed control, and emergency situations and how to handle them on a heavier motorcycle.
You can find the GuideBook here.
New Rider Tips Parking Lot Practice Guide
As much as we, as websites, can be competitors, we all share information on safety with each other. It’s part of The Rider’s Code: always look out for your fellow rider. As such, it’s worth mentioning this comprehensive, well explained, visual guide to multiple parking lot drills and why they are important to practice.
Expert Opinions on How to Practice & Why Practice Is Important
Full disclaimer—we have not contacted any of these people, nor have we even consulted them to produce any videos specifically for us. They do these videos because they love the hobby, they love that people are wanting to learn to ride, and they want you to succeed in your riding career.
Probably the most famous of all of the proponents of the five to survive rule is a motovlogger and YouTuber that goes by the handle “MotoJitsu.” A long-time rider, former racer, part-time MSF instructor, and published author of guidebooks for new riders, he breaks down sometimes complex ideas and maneuvers into easily digested videos, with demonstrations of each step along the way to improve your riding. His version of the five to survive rule is “Always be practicing.”
You can find the full list of MotoJitsu videos here, but we recommend one about low speed sharp turns to highlight just how handy mini-cones and practicing can be.
The next most popular (and very vocal about it) expert opinion for practicing is former fireman and EMS/EMT paramedic “DanDanTheFireman.” Apart from having a bike beard worth envying, he is a full-time MSF instructor as well as a YouTuber who has developed his own version of five to survive known as “The S.M.A.R.T. Rider.”
One of the best tools he uses to reinforce practice is taking, with permission, examples of actual helmet-cam and bike-cam incidents, close calls, and such, and breaking down each so you can understand how the incidents occurred.
However, instead of going through one of those videos, the video we’ve selected to show is why he himself goes out and practices on every ride:
The third and final expert viewpoint we have selected is from a full-time MSF instructor and proudly all-American “MCRider.” Many of his videos are about things to do at speed, what to do if you end up feeling the bike going wide in a corner, how to determine the counter-steering amount, and the like, but he also has a great deal of low-speed and five to survive practice routines you can use yourself, such as in the following video:
