
The Mechanics of Braking
Weight Distribution, Center of Gravity, & Overall Weight
Weight distribution, center of gravity and overall weight of the bike with fluids has an impact on how the bike will react to braking. Like we learned in High School physics, Interia is a huge factor when considering braking on a motorcycle.
Inertia is defined as an object in motion stays in motion as the same speed and direction unless acted upon by an unbalanced force. This unbalanced force is a combination of the brakes, friction of the tires on the surface and the direction in which both wheels are travelling.
Different Types of Brakes
Brake types make a difference. They are generally broken down into two categories: drum and disc brakes.
Drum brakes (which are older, less efficient technology and usually found on older classic bikes) and more modern disc brakes. I’ll just briefly touch on drum brakes since they are a fading technology. The most obvious benefit of them is there is no fluid to change. The downside is that drum brakes are a completely enclosed system where there is no way for heat to escape.
Braking creates heat (friction is the source of braking, friction creates heat). The better and more efficient the brakes are with dispersing heat – the better they work in general. Heat in brakes creates something called a brake fade, as the drum or disc gets hotter, the stopping power becomes less and less.
This is why on bikes with disc brakes where the discs are in the open rather than an enclosed chamber, there are little holes or even “petals” (wave shapes on the outside of the disc), to disperse heat the most efficiently with the technology we have now.
More pistons in the brake calipers on disc brakes also translate to better stopping power. There are other things in the system that can improve braking power through upgrades which will be saved for another topic.
Weight Transfer In Braking
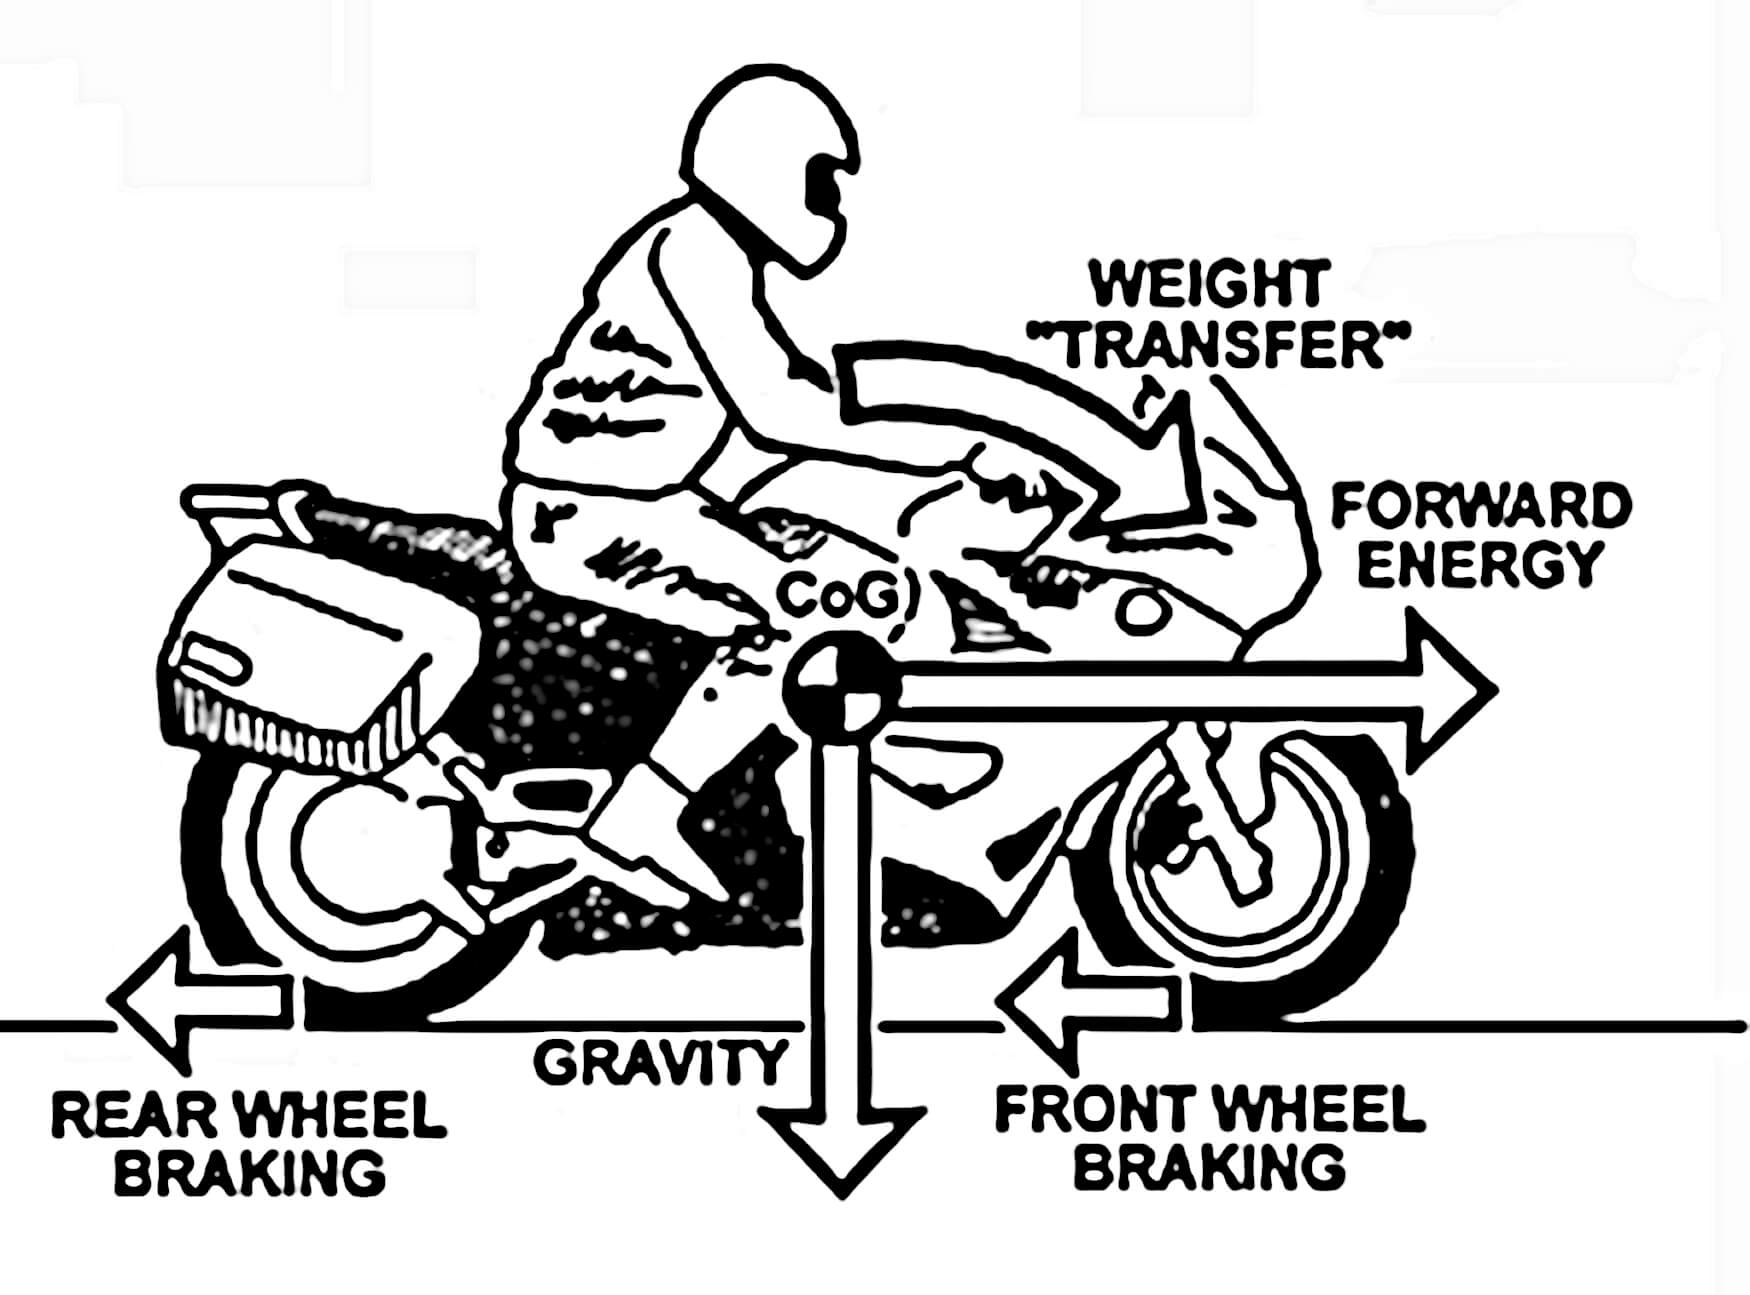
Image courtesy of Sound Rider
Back to the topic of different style of bikes – these design styles each affect how slightly different brakes react, but with basic breaking – all the concepts are the same.
Cruisers for example have a longer wheelbase and tend to be much heavier than sports bikes and their center of gravity is lower – so generally there would be a little more use of the rear brakes – although front brakes would still need to be used more as weight shifts forward (back to Newton’s First Law of Motion, Interia).
Newer riders won’t need to get into the more advanced knowledge of that – I’m keeping it simple and encouraging research as you gain more miles in the rider’s seat. It’s something I can get into on a later topic.
Traction Differences
Riding in different elements and various surfaces can also have an impact on the effectiveness of braking (for this article, we will discuss techniques for driving on asphalt, as off-road/ dirt braking and traction have a slightly different concept).
Ideally, braking is most effective when the tires are inline and the bike is upright, however – the roads are unpredictable and you need to learn how to handle braking in any and all circumstances and a lot of it is working from the basics, practice and muscle memory.
I get scoffed at from some students when requesting that they repeat exercises – but the fundamental reason behind it is to build muscle memory and that only comes with consistent repetitive movements and actions.
Load Difference
What I mean by load difference is the amount of braking force with both the front and rear brakes together and individually. So maybe you were told that there was 70% stopping power in the front brakes and 30% in the rear, or 75% front, 25% rear.
That can be true to some degree, depending on what type of brakes, weight, etc as I’ve already mentioned. That ratio can actually vary depending on a variety of factors and most of all with front weight transfer and load.
Generally speaking the majority of your stopping power is in the front brakes and can be as much as 100% if the rear tire comes off the ground. There is certain factors that need to be input to the bike in order to that to happen such as traction change, a sudden speed change in the rear tire – for example – the tire skidding to being released suddenly which can put a person in a world of hurt – so not recommended.
As you begin to apply the front brakes, if done correctly, the weight should start to transfer from the rear to the front. This will put pressure on the front suspension and increase the rubber footprint attaching the tire to the road (increased area of force, is increased friction, is increased braking capabilities).
Some information referenced from Motorcycle Braking Systems.
Proper Braking Application
Clutch Before Brakes When Coming to a Stop
If coming to a stop, you should always get in the habit of two things in addition to braking.
- Grabbing in the clutch to cut power transfer to the wheel and keep the engine running
- Tapping down like Thumper from Bambi on your shifter to prevent from having to keep track of what your gear is.
If you’re stopped, you should always be in first gear to use all the power if you need to go again suddenly.
When Do You Use The Front Brakes
Generally front brakes are used when stopping, roll back on a slope when stopped and emergency braking – again this is something that can be discussed more in depth in advanced techniques, but for simplicity – these are it’s two functions.
For braking to come to a stop or slow down, utilizing the front brake in a gradual squeeze and putting pressure until essentially you can’t squeeze anymore is using the full front brake in addition to the rear. Please don’t get into the habit of relying on your rear brake only to stop as now you are only giving yourself a fraction of the stopping power that you might need.
If done correctly, that front brake squeeze should transfer weight to the front and increase pressure on the front tire with no rider movement necessary. In fact, it is recommended to keep standard riding position with your knees and thighs hugging the tank and a relaxed but firm upper body.
If the transfer is done incorrectly and you grab the front brake too quickly, you can cause the front tire to lock up and not get that chance to gain traction – something called a front brake skid. To correct this, you gently and slightly release and reapply the front brake.
Nothing in riding I find is sudden and takes major movements, it is more subtle and micro adjustments. With time, practice and muscle memory, your movements automatically become faster and smoother. Like with anything, this takes time, and practice.
When Do You Use the Rear Brakes
Generally the rear brakes are used for scrubbing off speed while going slower (such as a parking lot or rush hour traffic) or keeping the bike from rolling back on a hill. There are other applications for the rear brakes, but for beginner information, this is all you should use it for – or in combination with the front to slow down in emergencies.
If this is an emergency stop, and you’ve found that you’ve pressed the rear brake too hard and it goes into a skid – do not release it.
Ride the skid out because if you’ve locked the rear, you now have zero stopping power there and releasing the brake will cause the wheel to go from no momentum to too much, especially if the rear is at an angle from the front of the bike. That sudden action will cause the rear end to buck the rider up off the seat in front of the bike that now no longer has a rider to hold on the brakes.
You could end up in a world of hurt.
Learn to Use Both: Efficiently and Effectively
Learning to use both the front and rear and where it is appropriate can make a huge difference in your future riding lifespan. Without building muscle memory and good habits, a panic situation can end up becoming a disaster.
Common Fear: Will I flip over the front of the bike by grabbing the front brakes too hard?
: If you haven’t changed the trajectory of the wheels by going over something, causing a rear wheel skid to suddenly let loose, it isn’t likely at all. I’ve seen where someone goes over a speed bump too fast and as their rear tire is up in the air still while the front touches – grabbing a handful of front brake would cause a flip. But if you are keeping control of your bike, it shouldn’t happen.
There are terms you might’ve heard called low-sides and high-sides. Basically low side (generally happens in corners) is where traction changes on the rear or the rear tire skids beyond the tire grip. I already described a high-side but basically it’s where the rear of the bike goes from no traction to all traction in the blink of an eye and throws the rider off.
To avoid a low side, it’s important to gear down/change speed prior to a corner and do not change inertia mid-corner if it can be helped. If needed (such as a deer jumping out in front) try to be as smooth as humanly possible when braking. Generally avoiding a high side is just riding out a rear skidding tire and not releasing it if you’ve locked it. (Usually you’ll hear the screech of the tire).
Be aware of your riding habits, take a reputable course and make sure you don’t ride beyond your ability and your know-how of getting out of a situation. Safety and training courses have valuable information and skill building even for riders that have been riding for years.
It’s surprising how over the years, skills can fade and bad habits creep up – they are designed to wipe the slate clean and get their students to become better riders as there’s so much more to riding that just twisting the throttle and hanging on.
Braking in rain, gravel and other loose surfaces is the same, just slow yourself down (safely of course as you don’t want to obstruct traffic) as now your stopping time will increase – so adjust your riding for that. Stopping time is the amount of distance your bike travels in the time from initial brake application to a complete stop.
A Good Habit to Get Into
I have a rule for my students – if the bike is off its kickstand and you’re standing beside or sitting on it, get in the habit of being on one brake or the other at all times.
This can prevent an embarrassing tip-over should you lose balance or grip on a foot as now you only have to concentrate on correcting yourself left to right and not front to back in addition (rolling forward or backwards).
I can’t count how many times at gas stations or parking lots where that habit could’ve saved a rider from dropping his or her bike. Above all, it is best to avoid a panicked mindstate as all that happens is basic instinct (and bad habits) kick in and you lose your ability to rationally guide yourself out of the situation. The only thing panic does is complicate an already complicated situation.
Passengers and Luggage
Riding with a passenger and/or luggage can be both convenient and challenging in itself, and there are some things to keep in mind: Shifting weight.
When braking suddenly, depending on if your passenger is paying attention, where they are holding and how fast can be the difference between a controlled stop or a crash. Weight shifting forward, especially above the waist line can drastically alter not only handling, but braking distance.
Please allow an extra space cushion to the front and behind you to make up for the slower braking power available.
Avoiding New Rider Mistakes While Braking
Don’t Duck Walk
Duck walking is where you see riders using both legs to balance and “walk” the bike forward either while parking or stopping. Doing this shows that the person doesn’t have full control of the bike, mainly because they lose access to the rear brake and the throttle hand is controlling the front brake instead of the throttle.
Do Keep Your Right Foot on the Brake and Use Your Left for the Ground
This is where that habit of downshifting to first comes in handy and using the rear to control your speed is good as well. When moving the bike, you’ll have the most control when getting off and walking it (again there’s a correct way of doing that, but will be saved for another article).
Don’t Grab the Brake Levers Suddenly and Harshly
Think of the brakes as a bottle of ketchup. Squeezing and applying gradual pressure gives you just the right amount of ketchup. Squeezing quickly and harshly ends up in too much ketchup and it’s all over the place. Same thing applies to brakes.
If this is a new to your bike, make sure to learn how strong the brakes are by riding in a safe area away from traffic and testing to see how the bike slows by gradually applying the brakes.
Don’t Hover
The worst habit I see with new students is hovering their hands over the levers. Human nature when in a panic situation is to tense up and freeze and if your hands are over those levers, that’s exactly what happens plus more unfortunate situations such as crashing and injuring yourself. Just. Don’t. Do. It.
Motorcycle ABS (Automatic Brake System)
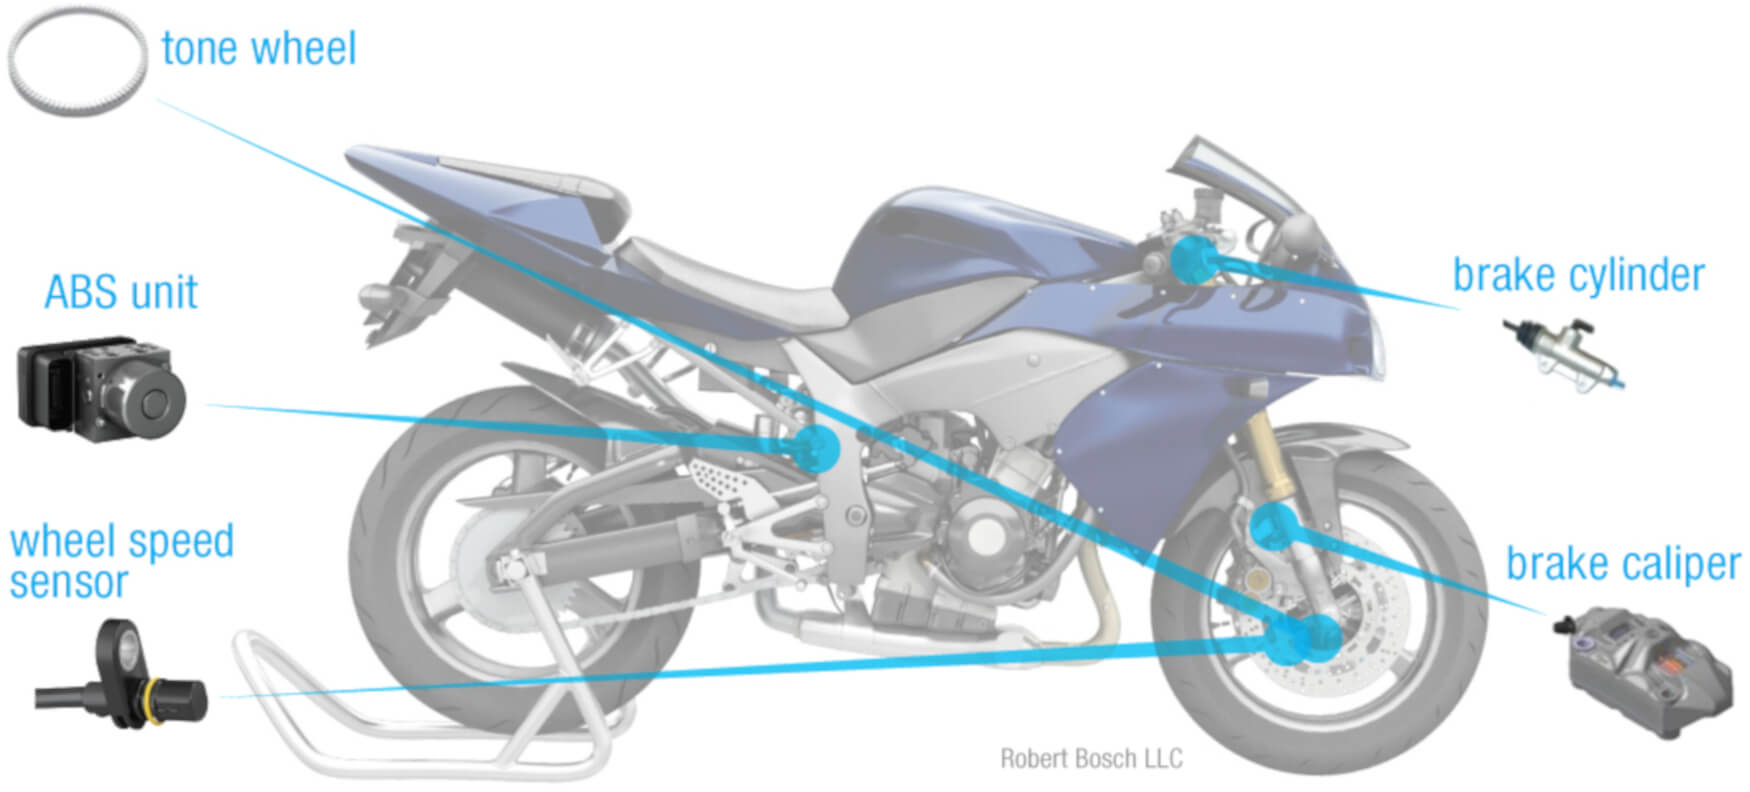
Image via Insurance Institute for Highway Safety
Motorcycle ABS is Now Different From Vehicle ABS
New ABS systems are based on a motorcycle’s size, weight and what it’s used for. Generally they are computer controlled and electronically adjust how much fluid pressure is given to any one brake to optimize traction and lessen braking distances.
Various Types of ABS and How They Work
The basic gist of how motorcycle ABS works is that there are speed sensors on each wheel that sends constant information to an ECU (electronic control unit or mini-computer as I like to call them). The ECU then determines if those wheels detect any brake slip or deceleration that exceeds a set threshold. There are basically two types of systems.
Piston Type ABS
This ABS system releases brake pressure through adding more room for fluid. It does this with a spring loaded piston and linear motor that pulls the piston back to create more room for the fluid, thereby decreasing the pressure on the brake.
Valve and Pump System
The second is a newer type called a valve and pump system. There’s more moving parts: pumps, solenoids (valve that open and close releasing fluids by electric current), motor and reservoirs/fluid accumulators. Basically, whatever the mini computer tells the braking system, the coils operate the in/out valves for the brake fluid by a motor-operated pump. Usually, you can feel the pulsations of the pump doing its work from the brake lever itself.
What to Keep in Mind with ABS and What to Expect
Keep in mind, ABS can be a wonderful tool for newer riders as it’s one less thing to worry about and rather bring your attention to the road. However, don’t let it become a crutch.
ABS, while being efficient – takes the judgement out of the riders hands and it relies on sensory information which can actually delay or slow braking.
It is recommended to keep that in mind and make sure to take command of your space by allowing more room in front, back and to the sides so that you always have room to escape should your brakes not work fast enough.
How Can ABS Hinder a Rider’s Skill
They are becoming more and more frequent on all different types of road models and I get asked the question, what is better? Having ABS or not having it?
The answer is up to the individual, but personally – mechanical systems fail eventually and especially with new riders, they haven’t quite mastered the front and rear brake relationships, so if that system goes and now you are relying on solely rider input, I have asked students – what then?
I remember having a student with their motorcycle license and taking the course to brush up skills, but only having rode on ABS motorcycles. When the person got on the manual bike they were in the habit of always grabbing a handful of front brakes and getting into quite a few unstable situations.
That’s just one example and why I feel that even if your bike has ABS, yes there are benefits – however if the system can be shut off once in a while so the rider feels how the raw brakes feel and respond, I’d suggest trying that.
Maintenance Importance and Preventing Hindered Braking
Pre-Ride Checks
Take a look at the motorcycle for any leaking fluids or dirt/dust and gunk on your brakes. A brown oily residue full of dust can indicate that your forks are leaking and should be taken care of right away.
Always clean off the dust on your forks – even if it’s not visible – give it a wipe before you ride. No cleaning can cause wear on the seals which results in leakage that can actually affect your braking power. If there is any sponginess in the brakes and you haven’t had mechanical training, please check it out with a reputable licensed motorcycle mechanic.
Check the Color of Brake Fluid
When should you change it? Generally, over time it will get darker and more opaque. Always refer to your owners manual or dealership when in doubt. If it’s dark brown, it’s definitely time to change it. Check out this site for some excellent tips.
Tire Wear and Importance of Replacing Tires
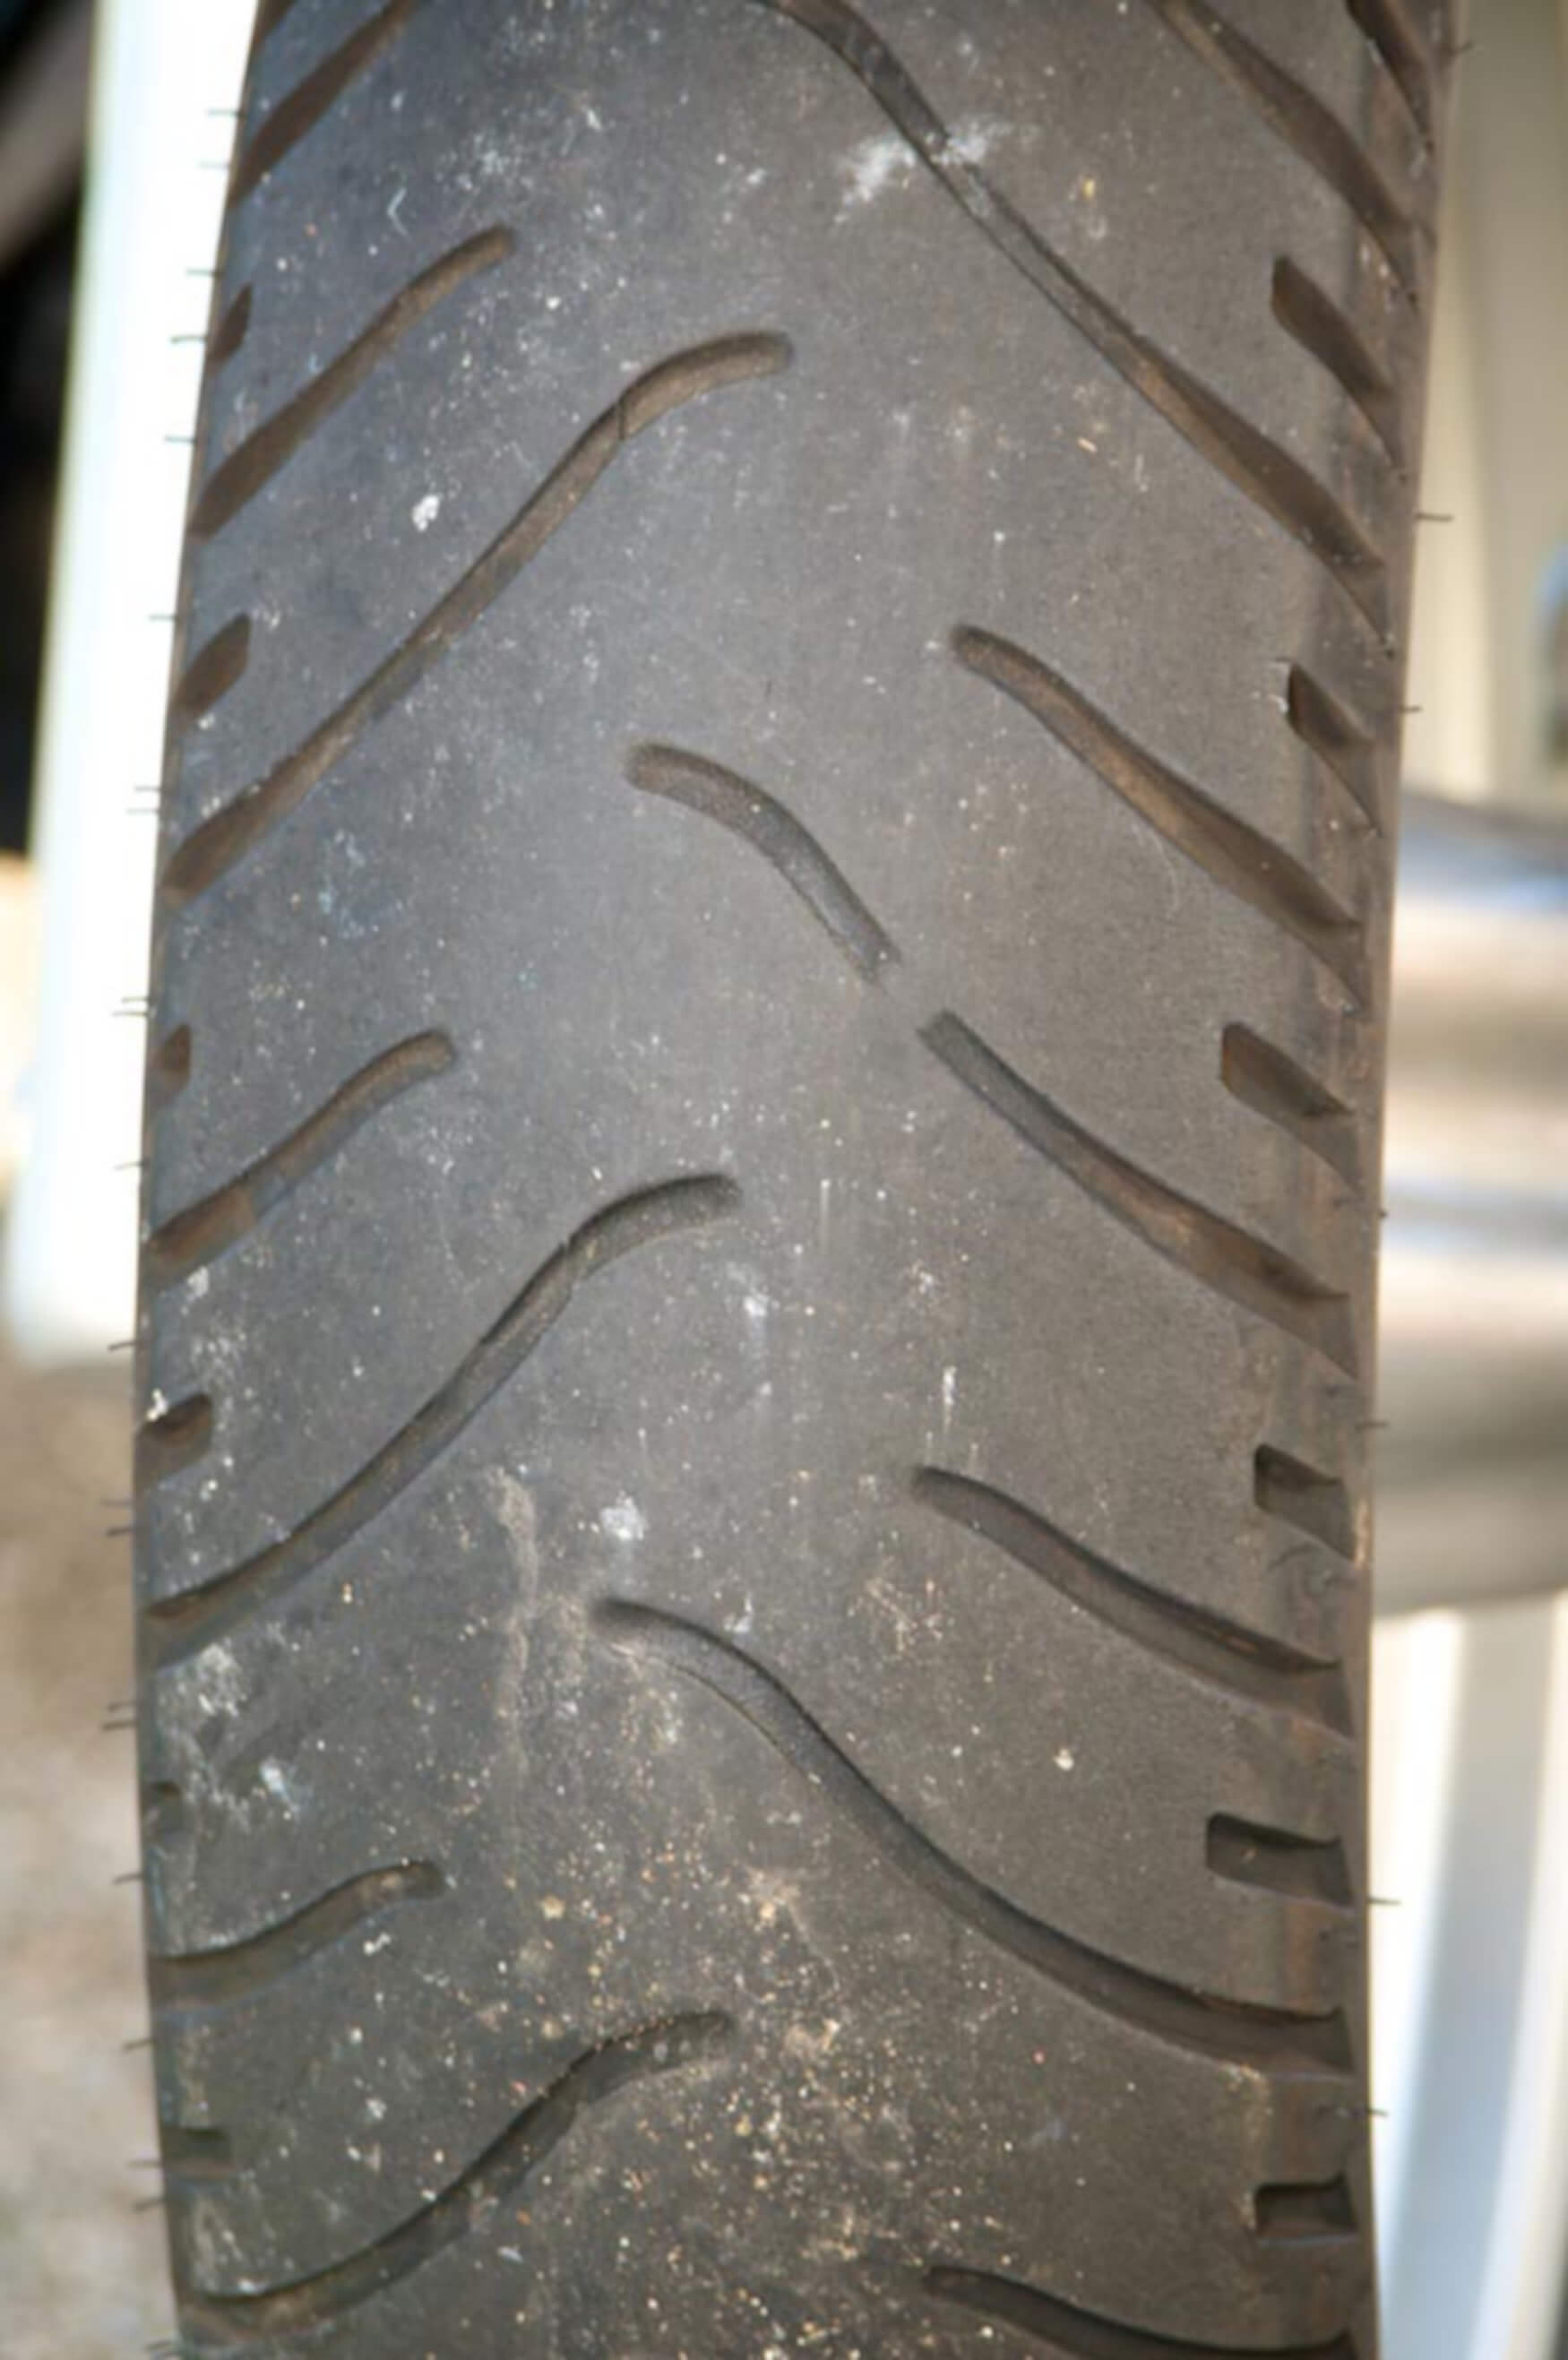
Image via The Bikers Garage
Over time, rubber can deteriorate. It is important to check the side walls of the tires for any cracks or signs of wear as it will signal it’s time to change the tires. Ideally tires should be changed at minimum every 10 years (depending on wear and other factors).
Other things to take note are tread and tire pressure. If the pressure is low, not only can it affect braking, but handling as well. Be sure to check tire pressure before you go riding, especially if it’s going to be a long trip. Tread has indicator strips that level with the rubber letting you know it’s time to get your bike new tires.
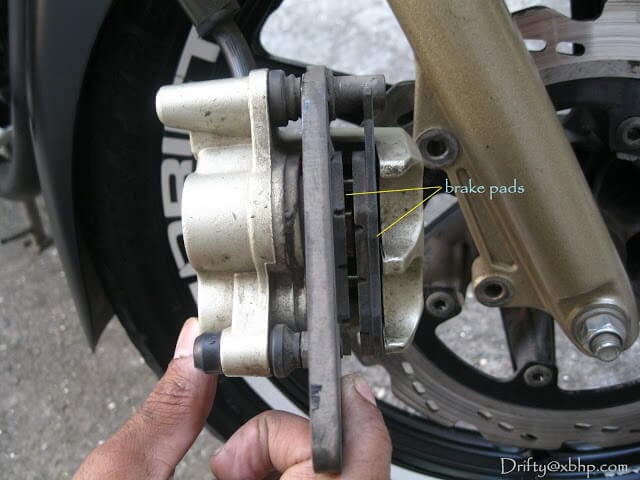
Image via Xtra Braking Horse Power
It is important to check your brake pads and discs for warping or wear. Like the tires, there are wear bars on the pads themselves. There is a wealth of information I found with regards to replacing and maintaining your brakes here.
Disclosure: This is solely the opinion of the writer with referenced materials. It is up to the individual rider to take responsibility for their own riding and skills development, handling and riding.
