

Starting from the Beginning
“For the things we have to learn before we can do them, we learn by doing them.” -Aristotle
I’m the kind of person who does their homework before tackling a new project or goal. I like to spend some quality time reading about (or better yet watching) how other people have done the same thing first so that I can avoid the pitfalls and setbacks they encountered.
Then I picture myself actually doing it using the second hand knowledge I’ve gained. It generally works pretty well.
After a certain point though, any further study and visualization is a waste of time and you just have to get out there and learn the rest through experience as Aristotle pointed out long ago.
My goal with this article is simple: I’m going to help you picture yourself mastering the basics of motorcycle riding using the power of online videos.
I would rather just invite you all over and teach you to ride in the alley behind my garage instead, but it’s just a little too impractical unfortunately.
Areas of Focus
There are a few different aspects of the BASICS of riding I want to touch on;
- Layout of controls and how to use them
- Throttle Control
- Clutch engagement and disengagement when shifting gears
- Braking and Engine braking
- Steering/Counter Steering and leaning the motorcycle
- Situational Awareness
Controls
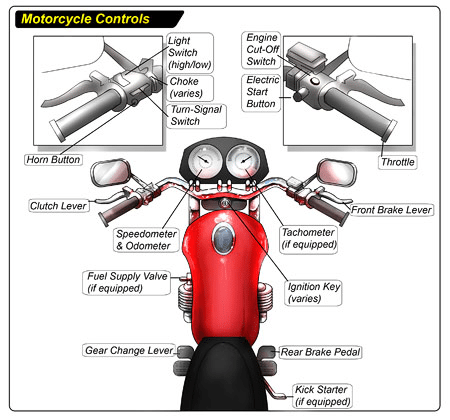
Here’s a great video from jolly old England created by a rider training school (http://www.artmotorcycletraining.co.uk). Using a Honda CB125, they go over most of the control locations on the bike and talk even about how to take it off the centre stand. Handy stuff to know.
Generally speaking all bikes are setup very similarly so you’ll be able to jump on just about any motorcycle and ride it once you learn how even after starting on just a little 125cc.
They don’t touch on where the turn signals are located or the horn and light switches. It’s fairly obvious though as all of them are within finger’s reach of where your hands hold the grips.
They mention the importance of smooth clutch control when launching your bike from a stop. This is one of the most challenging skills for learners to master.
Throttle Control

This humorous tattoo shows how the twisting action of the throttle on the right handlebar works perfectly.
Of course there’s more to it than that because fine throttle control is used when starting, stopping and cornering. Learning to be smooth can be tricky for new riders because you’re partly holding yourself on the bike by the handlebar with the throttle on it.
Managing the bike’s throttle effectively can feel kind of like trying to take the cheese off a mousetrap without getting your finger snapped for many new riders.
It takes time and practice to develop a strong throttle hand able to keep you on the bike but not choking the throttle to the point that you are jerky when applying more power to the rear wheel.
The best way I can describe the technique I use is staying firm at the wrist while leaving your fingers somewhat relaxed.
What it comes down to is pure slow speed riding, over and over until you get good. YouTuber Dodge Rider shows a couple of good drills to do in this video to work on just that.
He also touches on clutch control drills which go hand in hand with throttle control and is next on the list.
Clutch Control
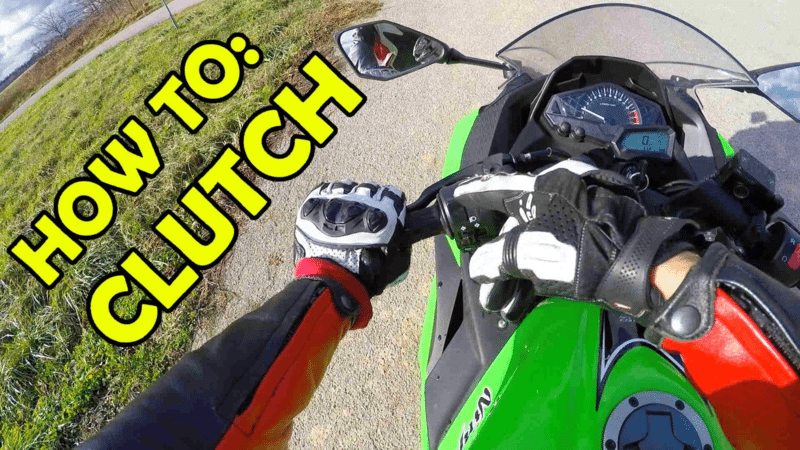
Here’s YouTuber Toro Moto explaining about the friction zone of the clutch pull.
Once you master engaging and disengaging the clutch things get a lot more fun because you won’t be stalling the bike so much when you pull away from a stop. You will at first, but it’s really no big deal so don’t get too frustrated with yourself.
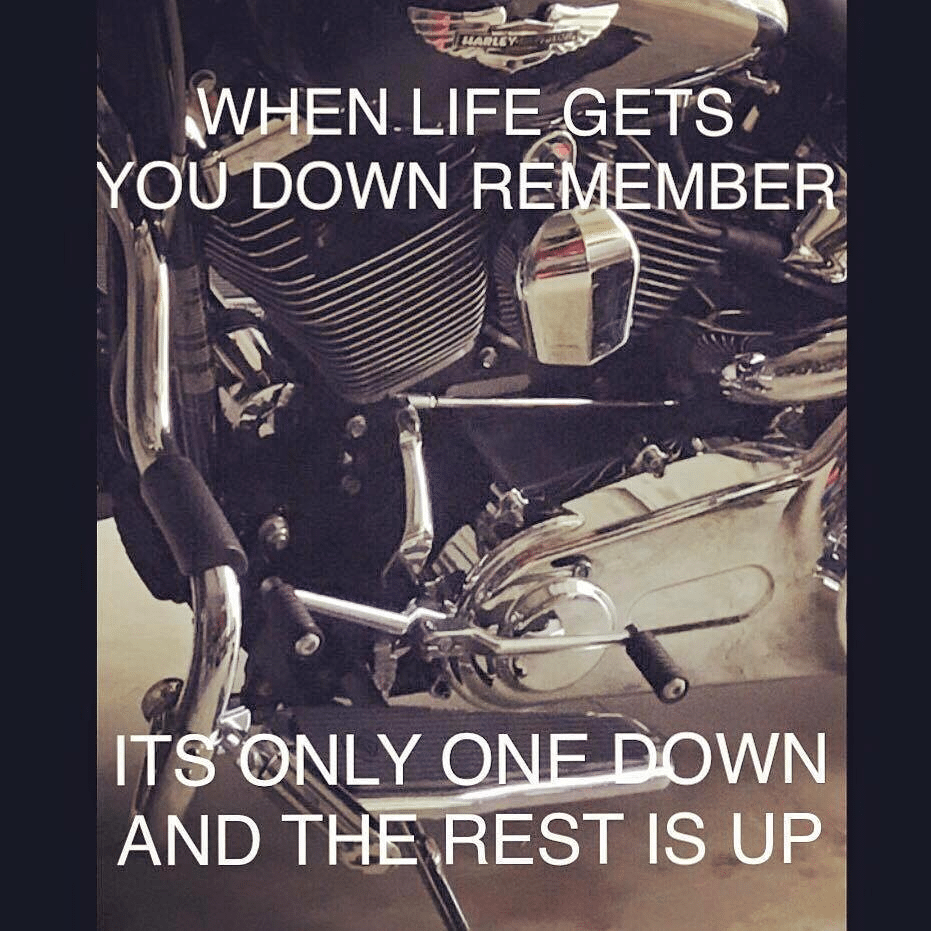
Remember that if you start to feel the bike getting away from you at any time all you have to do is pull the clutch lever in all the way and you can stop the bike quickly using the brake levers.
It’s an emergency escape plan to always keep in the back of your mind.
Shifting Gears
Now that you better understand the controls and how to smoothly apply and take power away from the rear wheel, you’re ready to take a ride down the road.
The meme above is a good way to remember the shift pattern on the motorcycle.
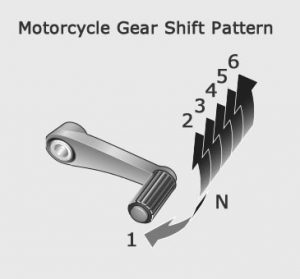
First gear is found when you push down on the lever and the other 4 or 5 gears are found by clicking upwards with your left foot.
Neutral is between first and second gear, but it’s designed to be skipped over when you are moving down the road and push up or down on the lever. You really can only go into neutral when the bike is stopped unless something is wrong with your bike.
Upshifting and downshifting is simple to do once you’re rolling along and the key in doing it well is paying attention to the rpm or speed of your engine’s rotation. Use your tachometer and your ears to know when to shift. After getting to know you’re bike’s “voice” you’ll know when it’s time to shift without looking at your tach.
- If the engine is screaming it’s time to upshift.
- If it’s bogging and the throttle isn’t crisp and responsive it’s time to downshift.
- If you’re in first gear and it’s bogging/lurching you need to give it more gas to go faster or pull in the clutch to stop.
Upshifts should be made when the rpms rise above the point the engine is making the most power in that gear, but you want to go faster. This means you keep the rpm in the sweetest range for power and fuel efficiency. Lower rpms at higher speeds are found in the top gear in your bike’s transmission. Some people call it the highway gear.
Each bike will have a different point where torque and horsepower levels peak. Where both are strong in the rpm range is where you want to be for passing slower vehicles. You use a lot more fuel when in this range, but acceleration and power are ideal there and you don’t stay in that range all the time. You just use it when needed.
You can look at torque/horsepower charts and specs for your specific bike in order to find out what that range is or you can feel it in the saddle while out riding too and just look at your tach.
For example, a 2015 Honda CBR300R generates maximum torque of 19 foot pounds at 7000 rpm. After 7000 rpm the available torque starts dropping off, but maximum horsepower isn’t found until 8500 rpm. This means life really begins on the CBR300R after 7000 rpm when high torque and horsepower levels nearly meet. That’s not to say you can’t ride around below 7000 rpm of course.
So as you ride off in first gear and your engine rpm climbs, if you want maximum acceleration you’ll time your upshifts to happen right around 7500 to 8000 rpm which is the sweet spot.
You certainly don’t have to wait that long to shift if you just want a casual increase in speed, I’m just pointing out roughly where optimal performance can be found.
You’ll find on the tachometer a redline section which is too high of a range for the engine to rotate at without causing problems. On the CBR300R this is at 10,500 rpm. You’ll want to avoid revving into that range for very long if at all. In reality, there’s no reason to rev past 8500 rpm on the Honda because horsepower levels drop off at that point.
You’re just making more noise instead of more power.
Here’s a great video explaining both how to start moving on a bike and also upshifting and downshifting from Competition Accessories YouTube channel. The rider illustrates good clutch control to avoid stalling and different techniques for shifting up or down. He gets caught up a bit at the beginning talking about wet and dry clutches for some reason, but just bear with him through that part.
Downshifts should be made when the rpm drop so low that the engine can’t maintain the speed you’re going efficiently, like when you climb a steep hill or want to pass a slower vehicle. For those times you’re looking for more torque to work with. If you drop down a gear it will cause the engine rpm to rise noticeably and ideally rise to just below peak torque if you can manage it.
The last video touches on the two ways to downshift well.
The first method is to pull in the clutch and roll back the throttle at the same time while clicking down on the lever then feathering the clutch out slowly once it hits the friction zone. This I do when I want to slow down coming up to a stop sign or a red light. It produces engine braking as the resistance in the engine slows the rear wheel. Excellent clutch control is necessary in this technique to avoid chirping or skidding the rear wheel.
The second technique is the one where you quickly pull in the clutch lever and click down the shift lever and “blip” the throttle just before you let the clutch lever out quickly but smoothly. This allows the engine to match the wheel speed immediately and so only increase the engine rpm while not slowing the bike down. This technique you use when you go to pass a slower vehicle or climb a hill.
Braking

Building on the engine braking I just mentioned is using your right hand lever and right foot lever being the front and rear brake controls.
When you downshift to slow down and begin engine braking it’s important for safety reasons to also activate your front and/or rear brake so that your brake light illuminates. I can slow my bike down really well just using engine braking but it won’t get the attention of the driver behind me unless my tail light gets brighter to warn them I’m slowing down.
75% or more of your braking power is supplied from your front brakes and should be where you put most of the force when you want to slow down or stop. Always apply the brake gradually as a sudden yank on the lever can lock the front wheel up in some cases.
MattLaw has this great video on YouTube to explain the science behind braking that is great for new and old riders.
Another tip to remember is that when you’re riding in rain you should do a quick initial application of the brake before you need it to clear any buildup of road grime on the rotors, release quickly and then do your actual brake application.
I personally only use my rear brake when I’m doing emergency stopping, slowing while going down a very steep hill or when I’m stopped on an incline to hold the bike. Don’t follow my lead on this though.
Like Matt Law said in his video as a new rider you should train to use your rear brake every time and remember only apply gentle pressure to it as it has a tendency to lock up the wheel very easily.
This video from Spamsafe on YouTube is full of good information on braking techniques and well worth a look. I like the way they show the different stopping distances between rear only, front only and combined braking.
One of the things I’ve noticed about beginner riders is the tendency to leave the right foot resting on the rear brake pedal. Riding the brake like this will cause the fluid to heat up a lot which degrades it and it also heats up the rear brake to the point the pads glaze and the rotor warps. Make sure you don’t make this common mistake.
Steering Techniques
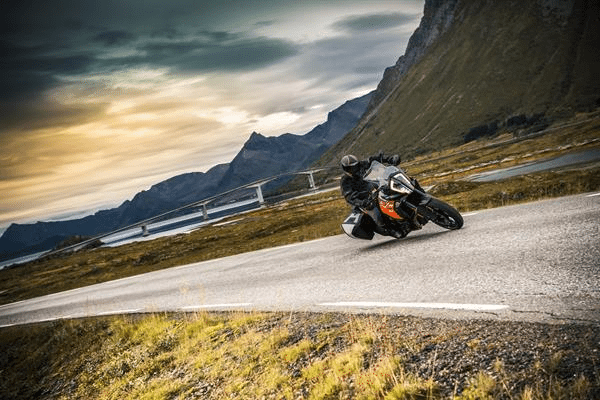
This is an area that even experienced riders often aren’t doing right even after years on the road. Poor steering combined with too much speed is often the reason people crash and get hurt so pay close attention and spend plenty of time training yourself how to do it correctly.
I tell new riders to steer with their backside, fanny, posterior, caboose, butt or whatever they like to call it and their hands.
By this I mean that you need to move around a bit in your seat to shift your body weight from both cheeks onto mostly one side when turning while you push on the handlebars simultaneously.
If you do this then you get full benefit of the motorcycle’s turning capacity.
Counter Steering Explained
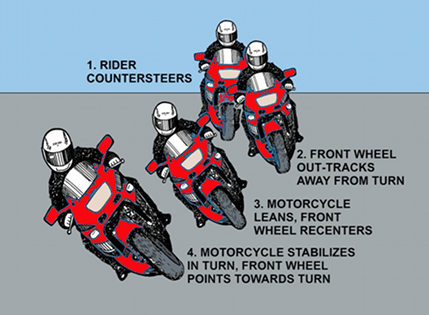
It’s not as simple as it sounds either. Steering on a bike is actually backwards from a car because of the leaning aspect. It’s called counter steering because in order to turn left a rider needs to push the left handlebar very slightly forward which in effect points the front wheel to the right.
YouTuber Riding With Dave explains and illustrates this technique very clearly in the video. I find at slow speeds I don’t countersteer much as Dave says, but I have heard more expert riders and instructors say that they can do it an any speed.
Counter Steering Fail
This next video is fairly graphic as it shows a rider crashing into an oncoming fire truck of all things! It clearly illustrates what happens when you don’t countersteer when travelling at speed. They actually put the video in slow motion to really show the bike standing up and veering the unwanted direction when the rider fails to counter steer.
The good news is that the rider survived mainly because they hit a vehicle manned by trained paramedics and first responders.
Situational Awareness
My Dad taught me when I started riding on road the following:
- Assume no one around you knows you’re there at any time
- Stay back at least 3 car lengths from vehicles you’re following
- Always scan the road 10 to 20 seconds ahead of you for danger
- Constantly check your mirrors especially when stopped at traffic lights
- Never ride in a vehicle’s blind spot for long
- Have an escape plan in mind from where you’re riding or sitting at all times
That’s good advice and has saved me from trouble more than once because on a motorcycle you are much smaller, faster and maneuverable than the cars and trucks. Just when they think they know where we are we can just as easily zip out and pass them in the blink of an eye because bikes are high performance machines.
One video I watched recently showed a great technique for dealing with the problem of cars pulling out in front of oncoming bikes they “didn’t see”. Even with high visibility clothing and really bright LED headlights on motorcycles these days, car drivers have real trouble telling how fast a bike is moving while coming towards them.
Here in Canada we refer to this as being “T-Boned” but the creator of this video calls it the “SMIDSY” which stands for “Sorry Mate, I Didn’t See You”.
Youtuber IBTV presents the Crash Course video to talk about it.
The technique involves weaving back and forth between the two tire tracks of the lane you’re riding in as you approach an intersection where a car is stopped and waiting to turn perpendicular to your path of travel. The sideways movement seems to help get the driver’s attention and make them see how quickly you’re approaching. They call it the SIAM: the Smidsy Identification Avoidance Maneuver. I’ve tried it and it seems to work.
Finally, here is a great video from DanDan the Fireman talking about a mile a minute covering all the tips I’ve mentioned so far and laying down some specifics for turning that I really like.
Final Thoughts
I hope you take in all this information, digest it and make it a part of your motorcycling mindset. If you do I guarantee that you will do very well out on the road while you perfect your blooming riding skills.
Don’t just rely on videos and blogs for your information, please. Enrol in motorcycle safety riding course and get the practical training they provide. You won’t regret it even if you already have a pretty good grasp of how to ride.
